• About
  • Contact

Gina Gibson

simple, healthy, meals

  • Home
  • Blog
  • Recipe Index
    • Appetizers
    • Breakfast
    • Dinner
    • Salads
    • Desserts
    • Smoothies & Juices
  • Lifestyle
    • Mom Life
    • Travel
  • Shop
    • Kitchen
    • Home
    • Beauty
    • Dress Me
    • Baby & Toddler
  • Homemade Products

Valentine’s M&M Blondies Recipe: Chewy, Gooey, and Perfectly Festive

January 16, 2025 by Gina +

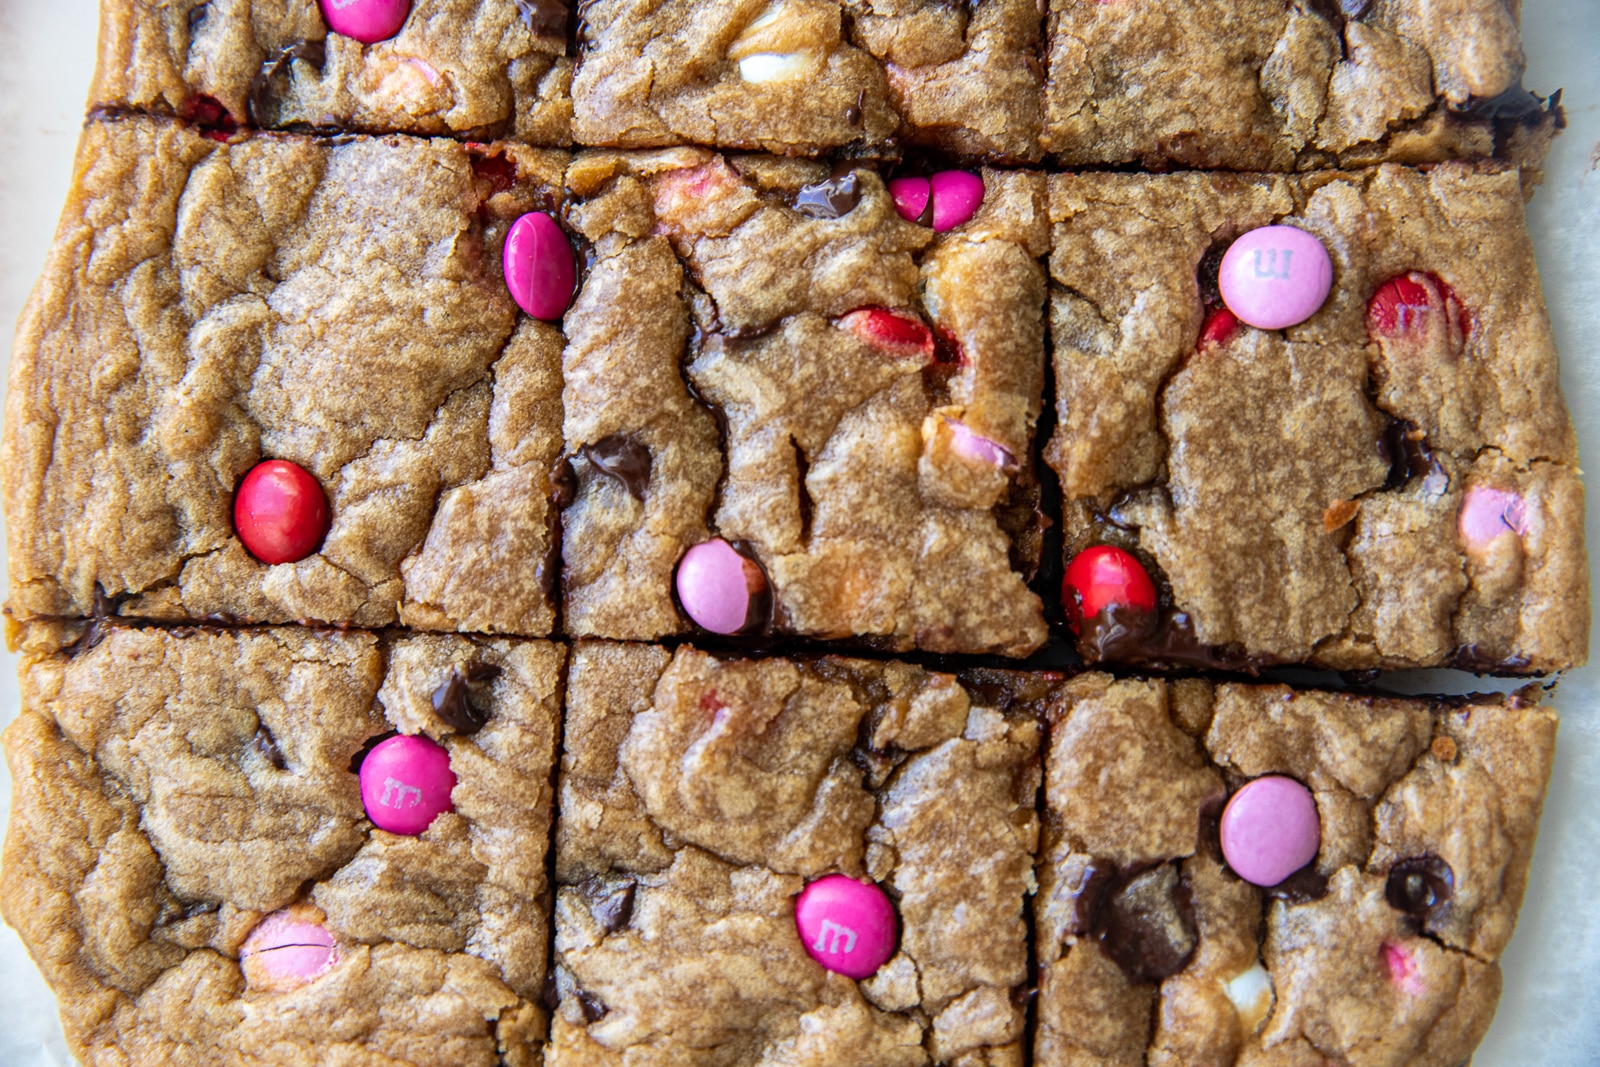
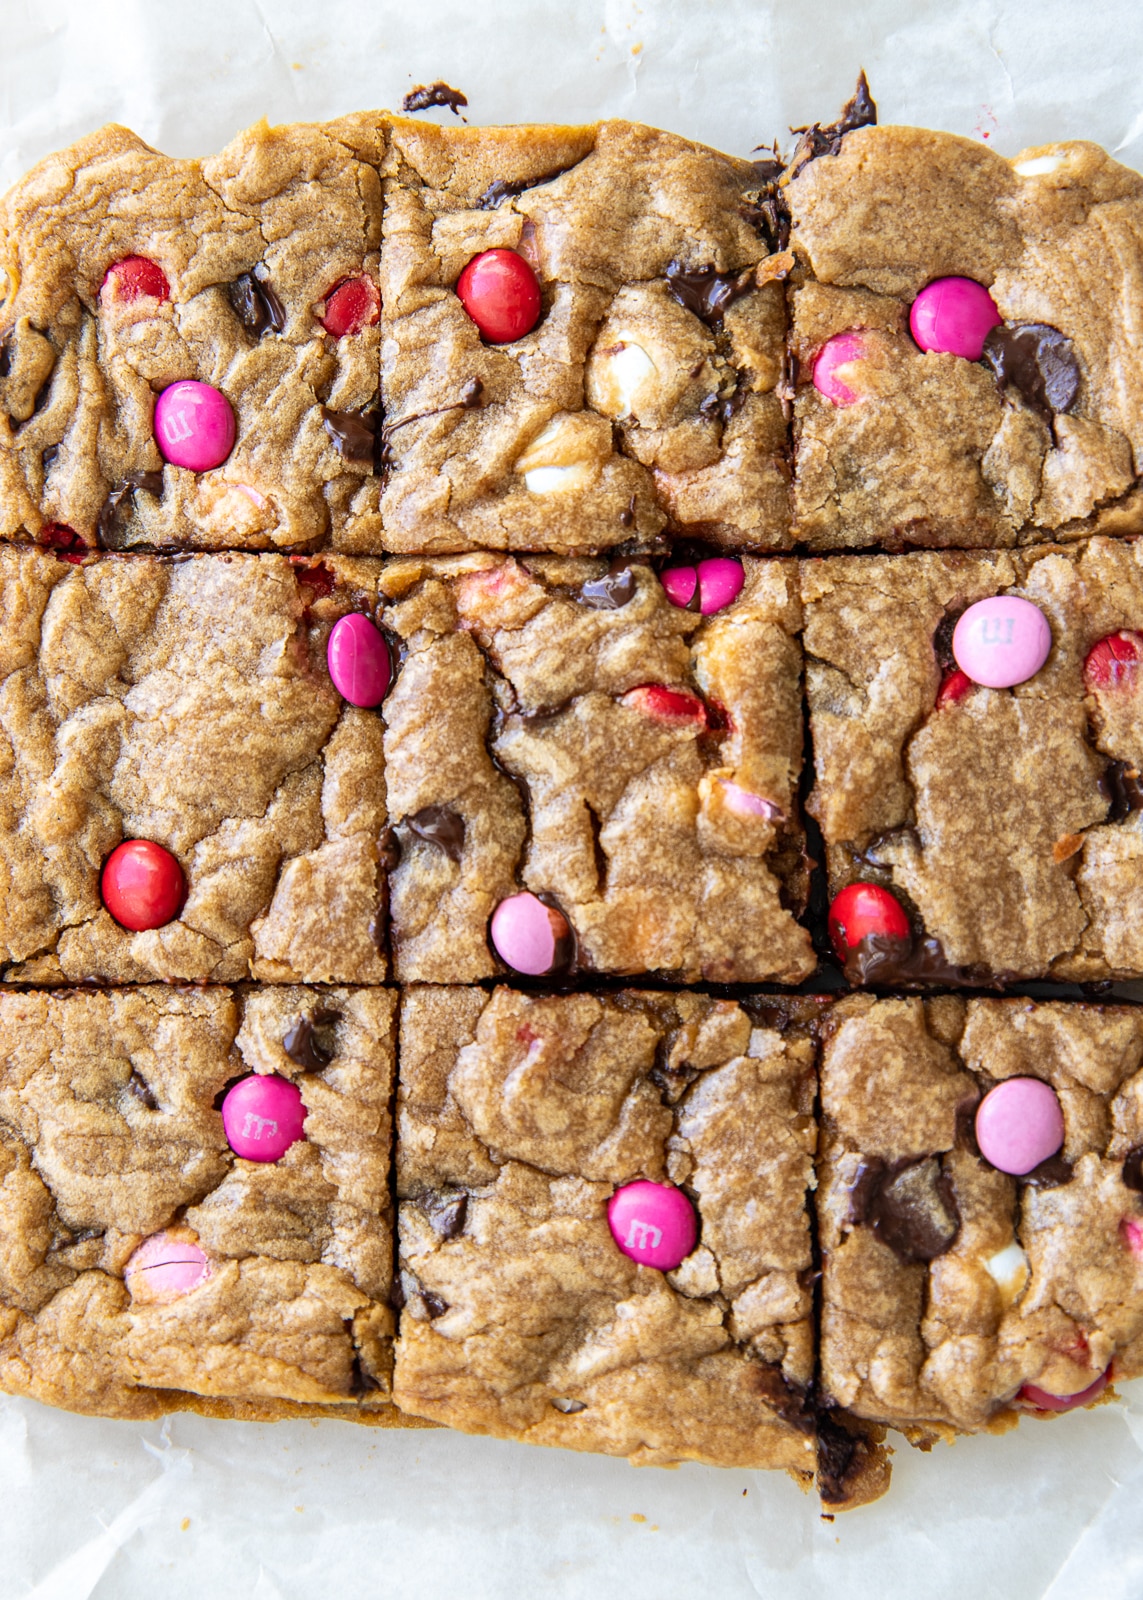
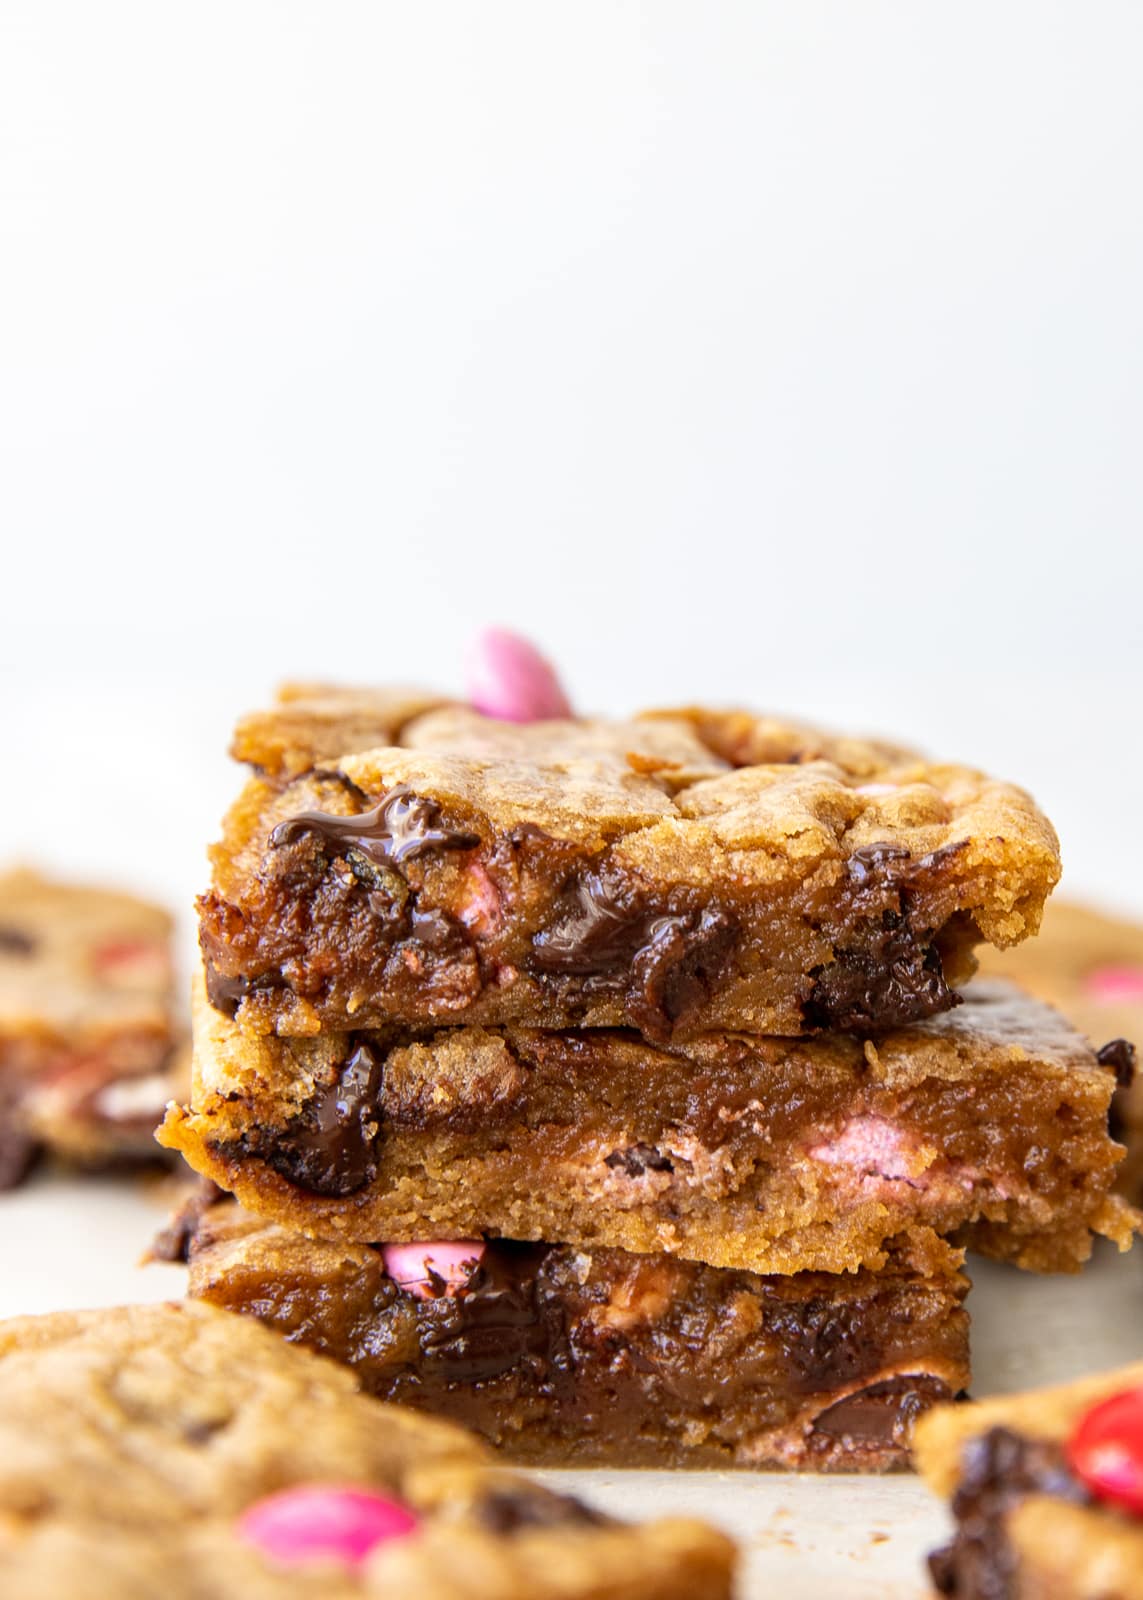
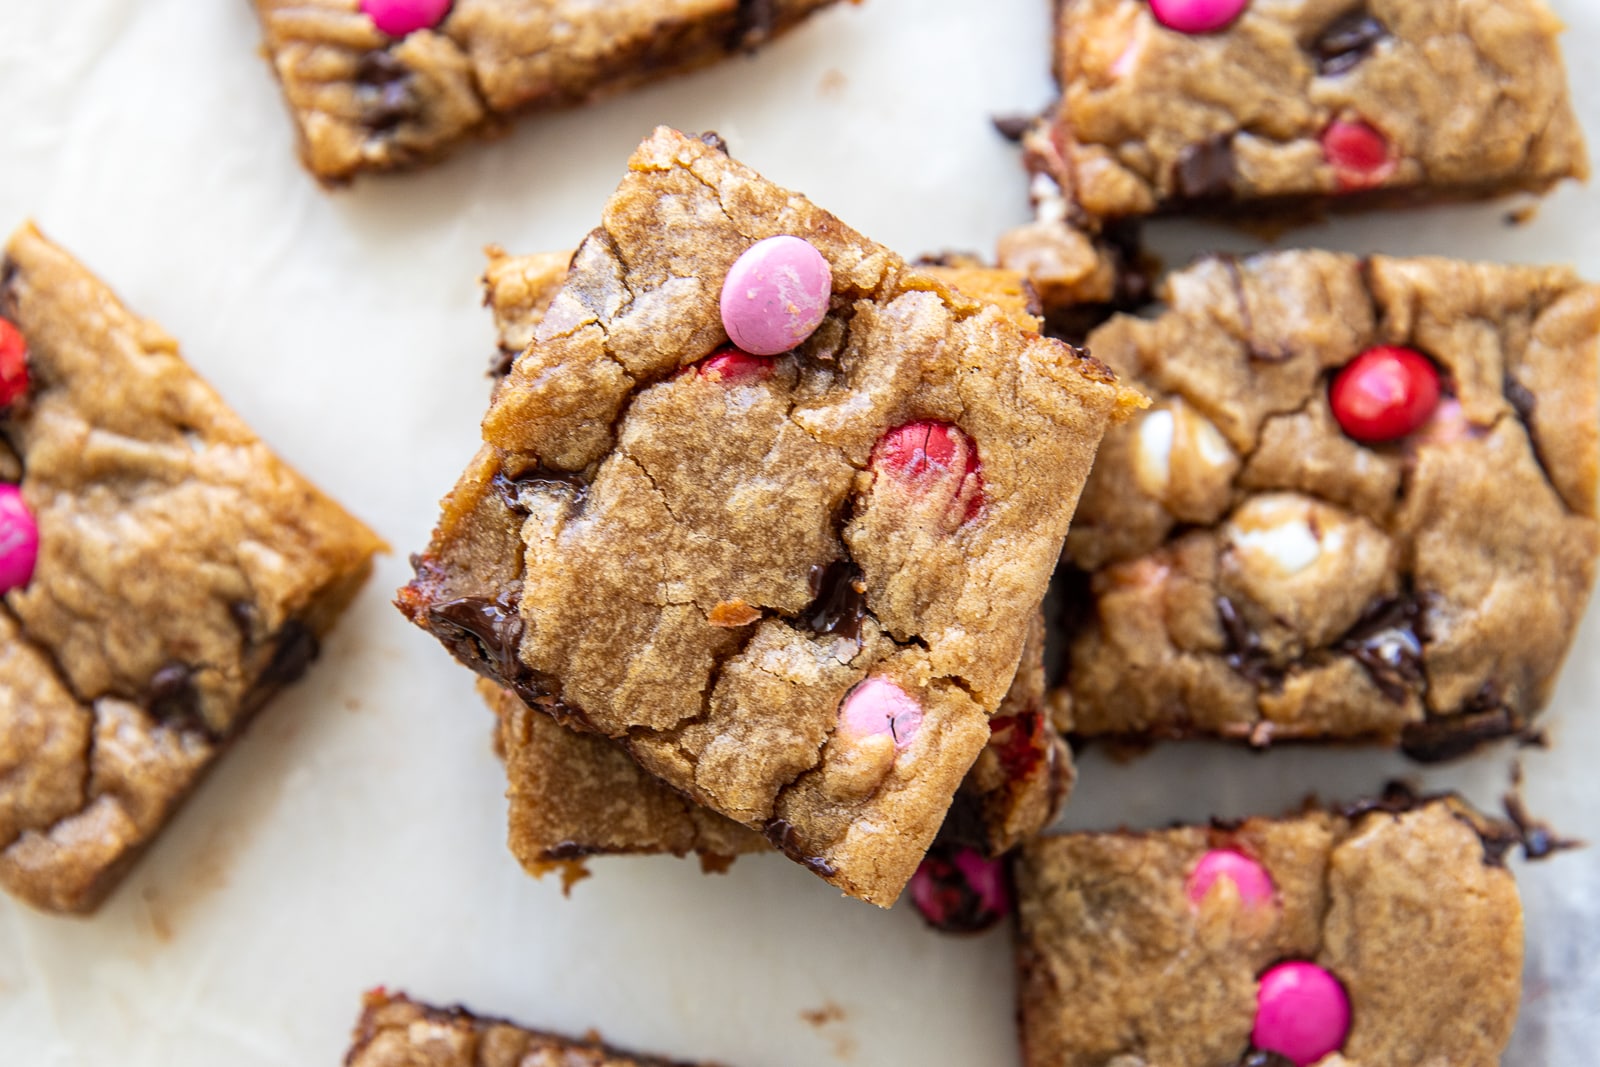
Valentine’s Day is one of my favorite excuses to bake something festive and fun. These Valentine’s M&M blondies are the perfect treat for any celebration or everyday treat. With a crispy top, a soft and chewy center, and just the right balance of sweetness, they’re guaranteed to impress anyone who takes a bite!

If you’re like me and love a good blondie, this recipe is your new go-to for Valentine’s Day. The festive red, pink, and white M&Ms make them feel extra special. Plus, these blondies come together in no time and are easy enough for anyone to make.
Why You’ll Love These Valentine’s Blondies

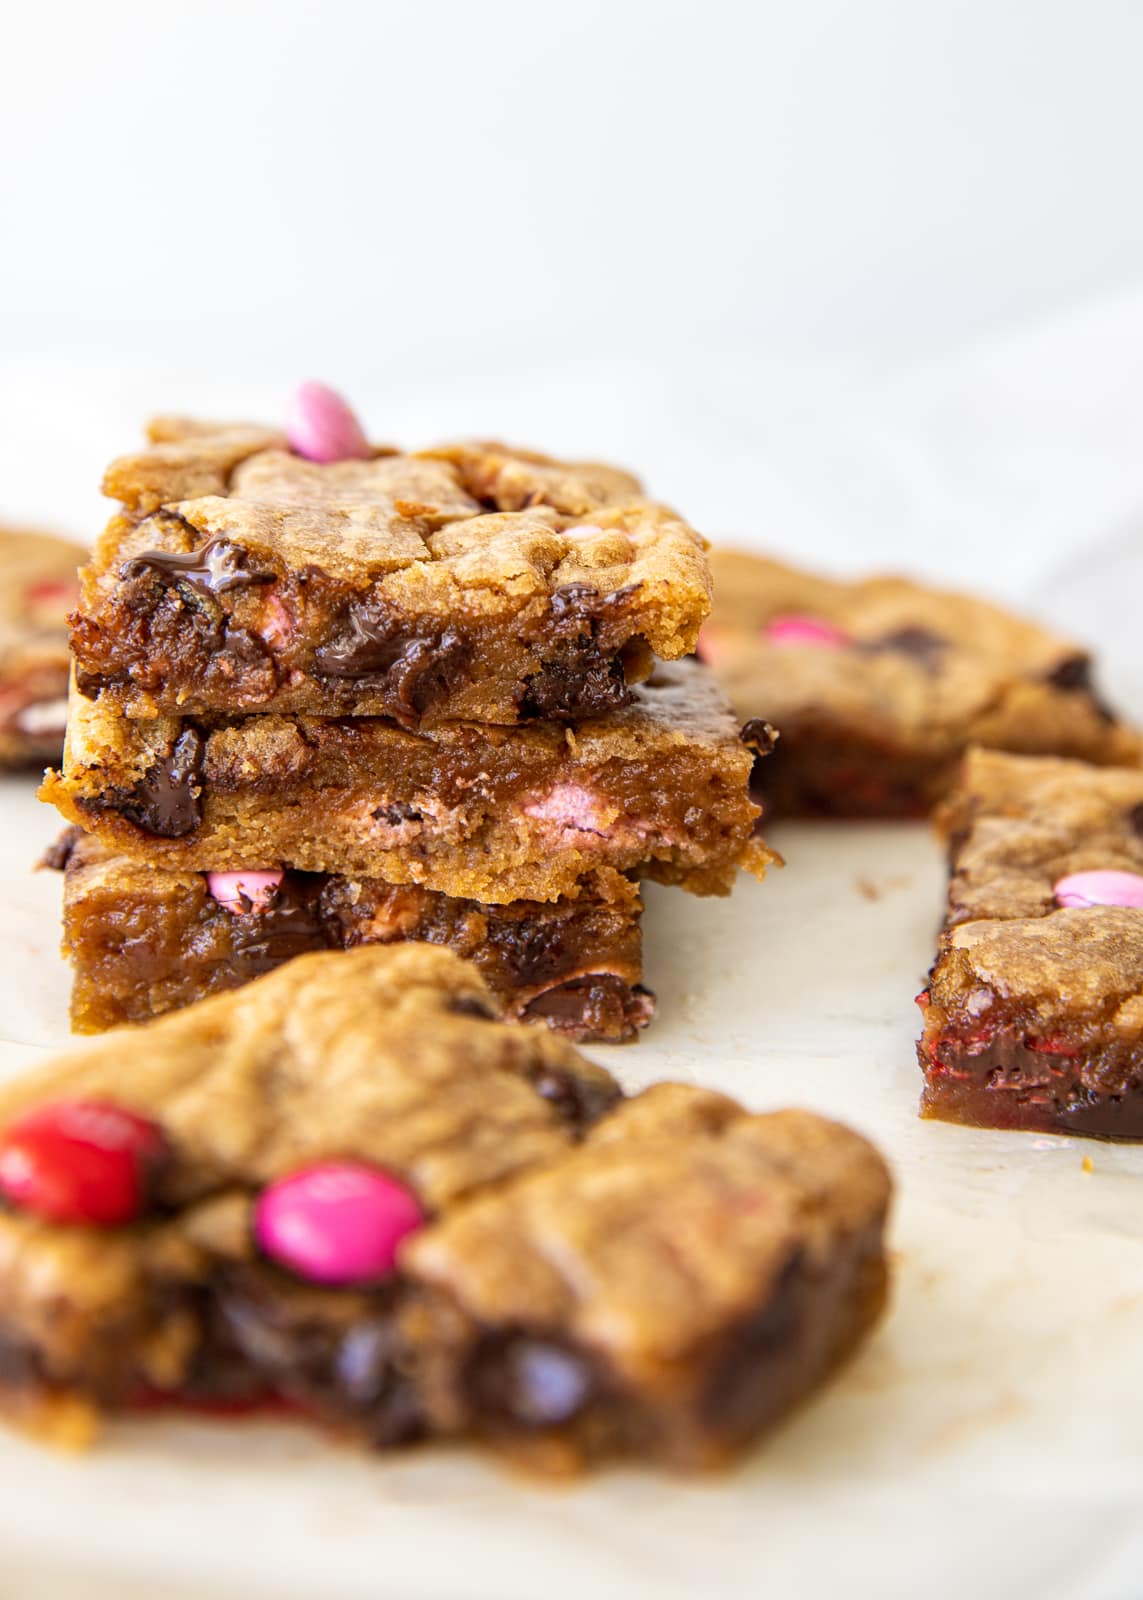
• Crispy and Chewy Texture: The top is golden and slightly crisp, while the inside stays wonderfully soft and chewy.

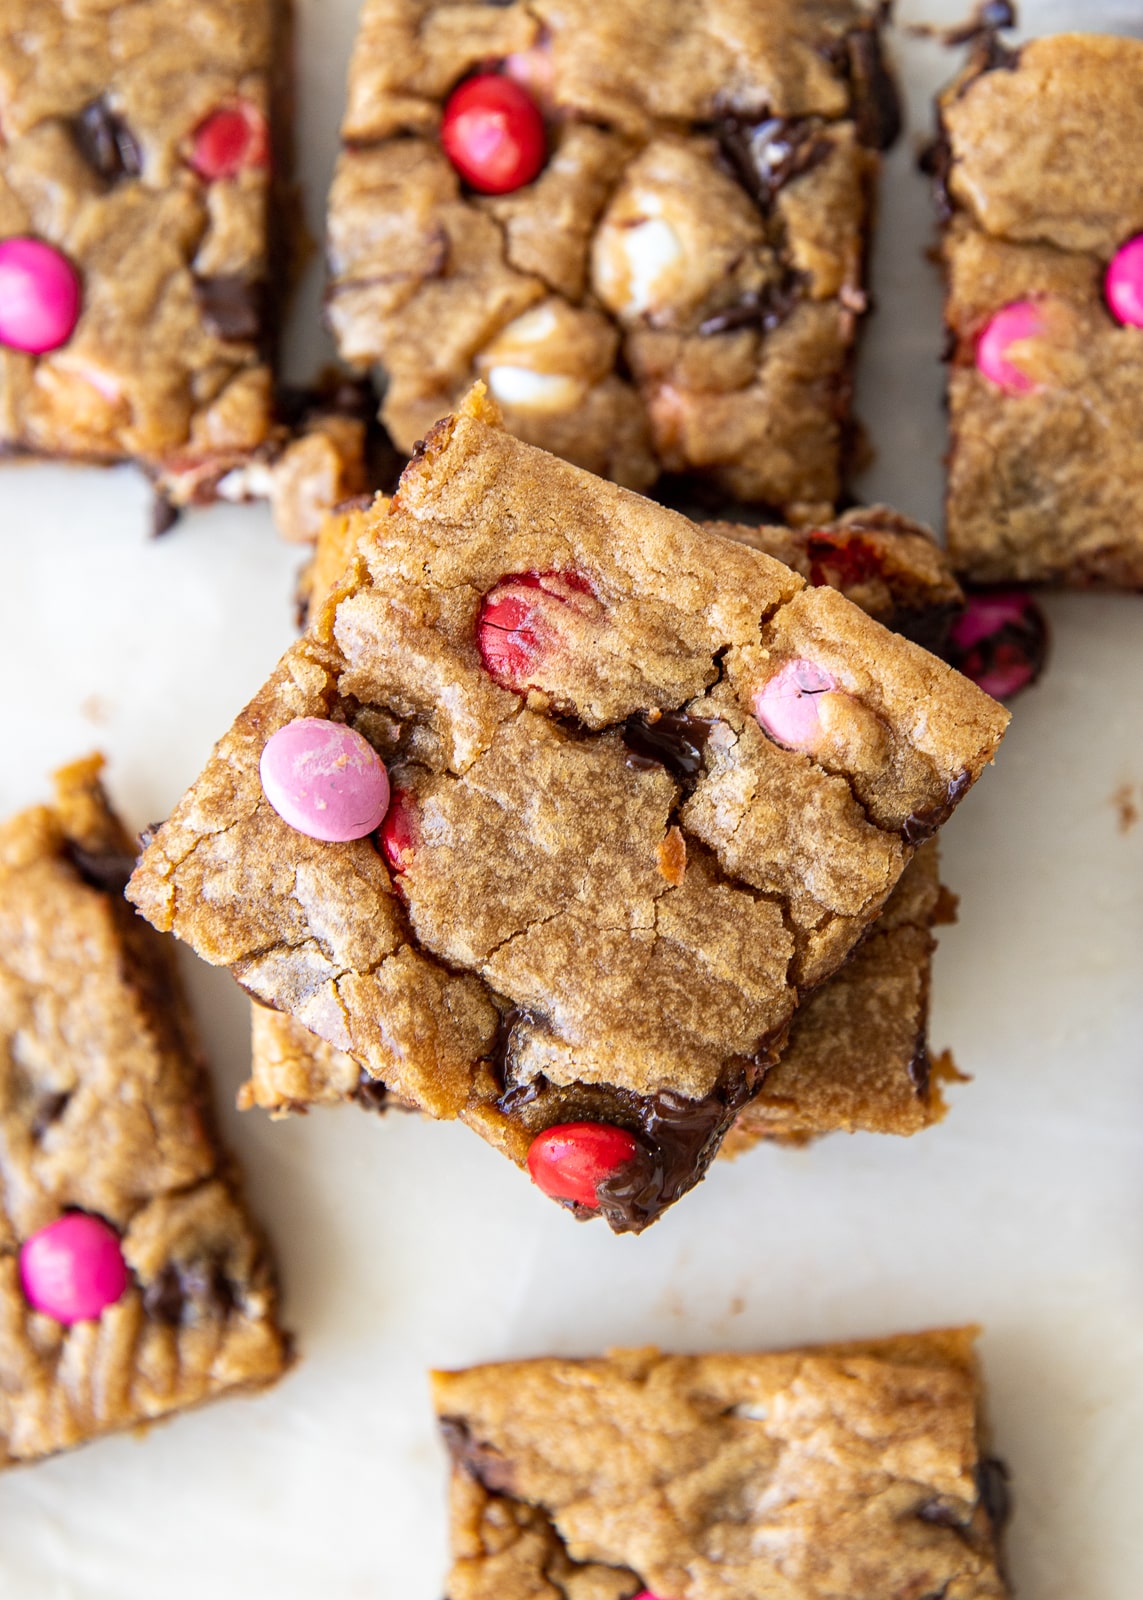
• Festive Look: Valentine’s-themed M&Ms make these blondies look as good as they taste.

• Quick and Easy: Minimal prep time and just one bowl make this recipe a breeze.

Ingredients You’ll Need

• 5 tablespoons (70 grams) unsalted butter, melted and slightly cooled

• 2/3 cup (135 grams) dark brown sugar, packed

• 1 large egg

• 2 teaspoons pure vanilla extract

• 140–145 grams (1 cup + 2 tablespoons) all-purpose flour

• 1/8 teaspoon baking powder

• 1/8 teaspoon baking soda

• 1/4 teaspoon salt

• 1/2 cup mini chocolate chips

• 3/4 cup Valentine’s-themed M&Ms, divided


Main Ingredient Breakdown

• Dark Brown Sugar: Provides a rich, caramel-like flavor and helps keep the blondies chewy.

• Unsalted Butter: Gives the blondies their signature soft texture and a buttery richness.

• Valentine’s M&Ms: Festive and colorful, they add crunch and fun to each bite.

• Chocolate Chips: A little surprise that adds bursts of chocolatey goodness throughout the blondies.


Instructions

1. Preheat and Prepare: Preheat your oven to 350°F. Line an 8×8-inch baking pan with parchment paper, leaving an overhang for easy removal.

2. Mix Wet Ingredients: In a large mixing bowl, whisk together the melted butter and dark brown sugar until smooth. Add the egg and vanilla extract, mixing until fully incorporated.

3. Combine Dry Ingredients: In a separate bowl, whisk together the flour, baking powder, baking soda, and salt. Gradually fold the dry ingredients into the wet mixture until just combined. Be careful not to overmix!

4. Add Mix-Ins: Gently fold in the chocolate chips and 1/2 cup of the M&Ms, making sure they’re evenly distributed.

5. Assemble: Spread the batter evenly into the prepared pan. Sprinkle the remaining 1/4 cup of M&Ms on top, pressing them lightly into the batter. Or you can add the remainder after baking.

6. Bake: Bake for 30–35 minutes, or until the edges are golden and set, and the center appears slightly underbaked. A toothpick inserted in the center should come out with a few moist crumbs.

7. Cool Completely: Allow the blondies to cool in the pan for at least 1 hour. For best results, chill them in the fridge for 30 minutes after cooling to help them firm up before slicing.

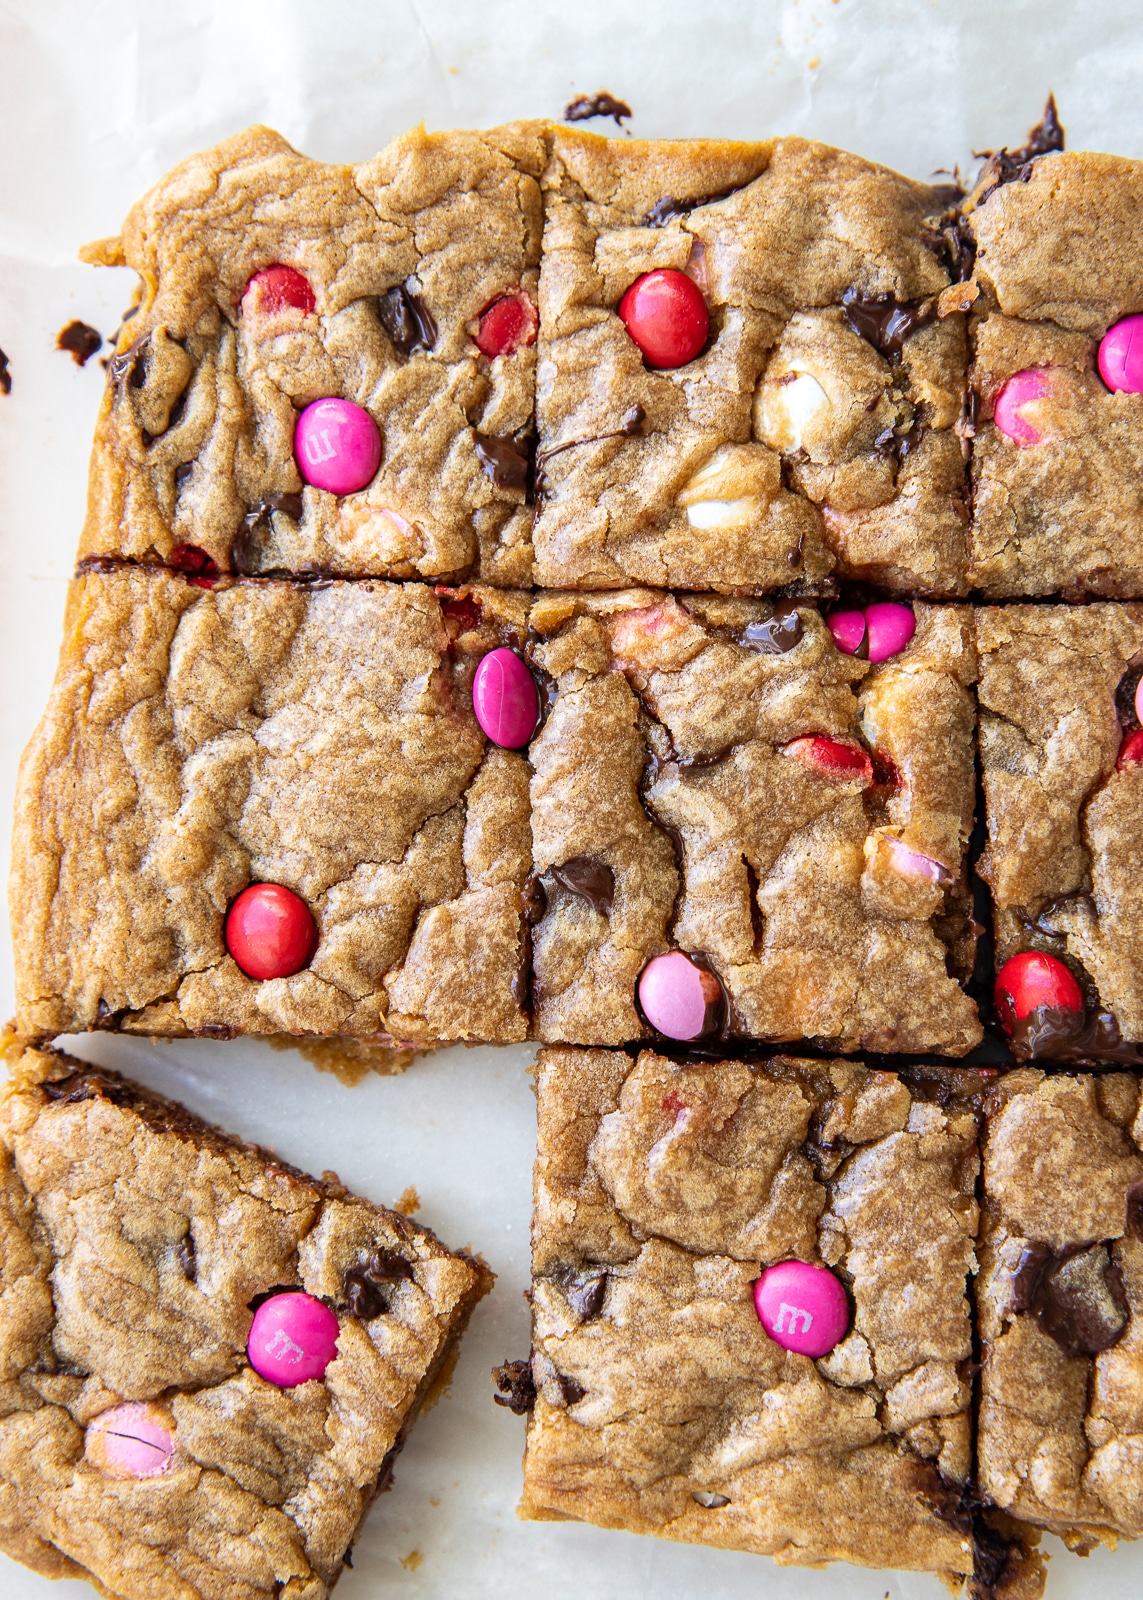
8. Slice and Serve: Lift the blondies out of the pan using the parchment overhang, slice into squares, and enjoy!
FAQs

Can I use light brown sugar instead of dark brown sugar?

Yes! Light brown sugar will work fine, but the blondies will have a slightly milder caramel flavor.

Can I make these ahead of time?

Absolutely. Store the blondies in an airtight container at room temperature for up to 3 days or in the fridge for up to a week.

What other mix-ins can I add?

Try white chocolate chips, chopped nuts, or sprinkles for more texture and variety!

Share Your Blondies!

I’d love to see how your Valentine’s M&M blondies turn out! If you make them, share a photo on Instagram and tag me. Let’s celebrate love, sweetness, and all things pink together! Don’t forget to leave a comment and let me know how you liked them.

Valentine’s M&M Blondies Recipe

Print Recipe
Prep Time 10 minutes mins
Cook Time 30 minutes mins
Servings: 9 large blondies
Course: Dessert
Cuisine: American
Calories: 332
Ingredients Method Nutrition

Ingredients
  

  • 6 tbsp unsalted butter
  • 2/3 cup dark brown sugar packed
  • 1 egg
  • 2 tsp vanilla extract
  • 1 cup all-purpose flour 140-145 grams total*** with the 2 tbsp
  • 2 tbsp all-purpose flour
  • 1/8 tsp baking powder
  • 1/8 tsp baking powder
  • 1/4 tsp salt
  • 1/2 cup chocolate chips
  • 3/4 cup M&M's *Valentine's themed colors

Method
 

  1. Preheat your oven to 350°F. Line an 8×8-inch baking pan with parchment paper, leaving overhang for easy removal, and lightly grease.
  2. In a large mixing bowl, whisk together the melted butter and dark brown sugar until smooth. Add the egg and vanilla extract, mixing until fully combined.
    6 tbsp unsalted butter2/3 cup dark brown sugar
    1 egg,2 tsp vanilla extract
  3. In a separate bowl, whisk together the flour, baking powder, baking soda, and salt. Gradually fold the dry ingredients into the wet mixture until just incorporated—avoid overmixing.
    1 cup all-purpose flour,2 tbsp all-purpose flour,1/8 tsp baking powder,1/8 tsp baking powder,1/4 tsp salt
  4. Gently fold in mini chocolate chips and 1/2 cup of the M&Ms, ensuring even distribution.
    1/2 cup chocolate chips,3/4 cup M&M's
  5. Spread the batter evenly into the prepared pan. Sprinkle the remaining 1/4 cup of M&Ms on top, pressing them lightly into the batter or you can press them in after baking and they will be more vibrant.
  6. Bake for 30–35 minutes, or until the edges are golden and set, and the center looks slightly underbaked. A toothpick inserted into the center should come out with a few moist crumbs, not wet batter.
  7. Allow the blondies to cool in the pan for at least 1 hour. For the best texture, transfer them to the fridge for 30 minutes after cooling before slicing.
  8. Lift the blondies out of the pan using the parchment paper overhang, slice into squares, and enjoy!

Nutrition

Calories: 332kcalCarbohydrates: 46gProtein: 3gFat: 15gSaturated Fat: 9gPolyunsaturated Fat: 0.4gMonounsaturated Fat: 2gTrans Fat: 0.3gCholesterol: 41mgSodium: 101mgPotassium: 77mgFiber: 1gSugar: 33gVitamin A: 298IUVitamin C: 0.1mgCalcium: 55mgIron: 1mg
Tried this recipe?Let us know how it was!

You might also like:

Frozen S’mores Bars: A Cool Twist on a Classic Treat Easy Apple Cinnamon Coffee Cake Loaf Pumpking Streusal Muffins – A Perfect Fall Treat Cranberry Bliss Loaf Recipe

Filed Under: Desserts, Recipes, Snacks

FROZEN BISCOFF ICE CREAM BARS 🤎🍦 No ice cream mak FROZEN BISCOFF ICE CREAM BARS 🤎🍦

No ice cream maker needed! These are layers of Biscoff cookies filled with the creamiest homemade no-churn Biscoff ice cream and an extra swirl of cookie butter through the center.

Easy to make and perfect for summer

Comment ICE CREAM and I’ll send you the full recipe!

Save this for an easy summer dessert and follow @gina_gibson_cooks for more simple, family-friendly recipes.
Just out here doing my little tasks and calling it Just out here doing my little tasks and calling it a day.
Peruvian-style chicken with creamy green sauce T Peruvian-style chicken with creamy green sauce 

The chicken is smoky, garlicky and grilled until juicy, but the creamy cilantro green sauce is what really makes this recipe. I could put it on just about everything.

I kept the heat family-friendly by using just one seeded jalapeño, but you can always leave some of the seeds in or add another jalapeño if you like things spicy. Serve it with rice, grilled corn, potatoes or veggies for an easy summer dinner the whole family will love.

For the chicken:

2 lbs boneless skinless chicken breasts
2 tbsp olive oil
3 cloves garlic, minced
2 tbsp fresh lime juice
1 tbsp white vinegar
2 tsp smoked paprika
1 tsp ground cumin
1 tsp dried oregano
1 tsp onion powder
1 tsp kosher salt
½ tsp black pepper

For the creamy green sauce:

1 packed cup fresh cilantro
1/3 cup mayonnaise
1/4 cup plain Greek yogurt
1 small jalapeño, seeds removed
1 garlic clove
Juice of 2 limes
2 tbsp grated parmesan
1 tbsp olive oil
1 tsp honey
½ tsp kosher salt
¼ tsp black pepper

Whisk together the olive oil, garlic, lime juice, vinegar and seasonings. Add the chicken and toss until well coated. Marinate for at least 30 minutes or up to 8 hours.

Add all of the green sauce ingredients to a blender or food processor and blend until smooth and creamy. Taste and add another squeeze of lime or pinch of salt if needed. Refrigerate until ready to serve.

Grill the chicken over medium-high heat for about 5–7 minutes per side, depending on thickness, until cooked through to 165°F. Let rest for 5 minutes, then slice and drizzle generously with the creamy green sauce.

Serve with rice, grilled corn, avocado, roasted potatoes or your favorite veggies—and definitely keep extra green sauce on the side.

Save this easy chicken dinner for later, share it with someone who needs new weeknight dinner ideas, and follow @gina_gibson_cooks for more easy, family-friendly recipes! 🌿
CHEESY BIRRIA RAMEN Rich and cheesy, perfect com CHEESY BIRRIA RAMEN

Rich and cheesy, perfect  comfort food mashup I. 

I used our favorite @momofukugoods noodles, Trader Joe’s birria, and plenty of cheese. The birria consommé gets mixed right into the creamy cheese sauce, so you get that birria flavor in every bite. Finish it with onion, cilantro and plenty of lime. 

3 packages Momofuku noodles
1 package Trader Joe’s Beef Birria, cooked and shredded (reserve ½ cup consommé)
1 tablespoon butter
2 cloves garlic, minced
4 ounces cream cheese
¾ cup milk
1 cup shredded Monterey Jack cheese
1 cup shredded Oaxaca cheese or mozzarella
1 ramen seasoning packet
¼ teaspoon cumin
Diced white onion, chopped cilantro, and lime wedges for serving

Cook the ramen noodles, then drain and set aside.

Melt the butter in the pan over medium heat. Add the garlic and cook for about 30 seconds.

Add the cream cheese, milk, ½ cup birria consommé, ramen seasoning, and cumin. Stir until smooth and creamy.

Reduce the heat to low and add the Monterey Jack mozarella cheese. Stir until melted.

Add the cooked ramen noodles and shredded birria beef and toss until everything is coated in the cheesy birria sauce. Add another splash of consommé if needed to loosen it up.

Top with diced onion, cilantro, a squeeze of lime, and extra consommé if you like.

Make sure to SAVE this one and FOLLOW along for more recipes 🙃
Summer hosting doesn’t have to be complicated. I Summer hosting doesn’t have to be complicated. 
I kept this backyard dinner simple with crispy chicken sandwiches that were a HUGE hit! I lightly coated chicken tenders in @lafishyfry Louisiana Fish Fry Brand Seasoned Chicken Fry, fried them until perfectly golden, then piled them onto toasted buns with sliced cheddar and peppery arugula tossed in @Tessemaes Spicy Dill dressing. So simple, so good.
To round out the spread, I set out @powerupsnacks Power Up Premium Trail Mix for an easy snack, @sourpunchcandy Sour Punch Bites for a sweet treat, and served everything on @SOLOcup cups and plates, which made cleanup so easy.
#Tessemaes #LAFishFry #SOLOBoldHold #SourPunchXBabbleBox #PowerUp
No-bake peanut butter pie. Creamy peanut butter No-bake peanut butter pie. 

Creamy peanut butter filling, a chocolate cookie crust, and absolutely no oven required. 

For the crust:
16 Oreo-style cookies
4 tablespoons melted butter

For the filling:
6 ounces cream cheese, softened
1 cup creamy peanut butter
⅓ cup powdered sugar
1 teaspoon vanilla extract
Pinch of salt
6 ounces Cool Whip, thawed

Optional toppings:
Melted chocolate, crushed Oreo cookies, chopped peanut butter cups, or chopped peanuts.

Pulse the cookies into fine crumbs and mix with the melted butter. Press into a small pie dish and refrigerate while you make the filling.

Beat the cream cheese until smooth. Add the peanut butter, powdered sugar, vanilla, and salt and beat until light and creamy. Gently fold in the Cool Whip until everything is combined.

Spread the filling into the crust, smooth the top, and refrigerate for at least 6 hours, or overnight for the best texture.

Before serving, drizzle with melted chocolate and sprinkle with crushed Oreo cookies if you’d like.

Save this one for your next summer get-together!
FROZEN BISCOFF ICE CREAM BARS 🤎🍦 No ice cream mak FROZEN BISCOFF ICE CREAM BARS 🤎🍦

No ice cream maker needed! These are layers of Biscoff cookies filled with the creamiest homemade no-churn Biscoff ice cream and an extra swirl of cookie butter through the center.

Easy to make and perfect for summer

Comment ICE CREAM and I’ll send you the full recipe!

Save this for an easy summer dessert and follow @gina_gibson_cooks for more simple, family-friendly recipes.
Just out here doing my little tasks and calling it Just out here doing my little tasks and calling it a day.
Peruvian-style chicken with creamy green sauce T Peruvian-style chicken with creamy green sauce 

The chicken is smoky, garlicky and grilled until juicy, but the creamy cilantro green sauce is what really makes this recipe. I could put it on just about everything.

I kept the heat family-friendly by using just one seeded jalapeño, but you can always leave some of the seeds in or add another jalapeño if you like things spicy. Serve it with rice, grilled corn, potatoes or veggies for an easy summer dinner the whole family will love.

For the chicken:

2 lbs boneless skinless chicken breasts
2 tbsp olive oil
3 cloves garlic, minced
2 tbsp fresh lime juice
1 tbsp white vinegar
2 tsp smoked paprika
1 tsp ground cumin
1 tsp dried oregano
1 tsp onion powder
1 tsp kosher salt
½ tsp black pepper

For the creamy green sauce:

1 packed cup fresh cilantro
1/3 cup mayonnaise
1/4 cup plain Greek yogurt
1 small jalapeño, seeds removed
1 garlic clove
Juice of 2 limes
2 tbsp grated parmesan
1 tbsp olive oil
1 tsp honey
½ tsp kosher salt
¼ tsp black pepper

Whisk together the olive oil, garlic, lime juice, vinegar and seasonings. Add the chicken and toss until well coated. Marinate for at least 30 minutes or up to 8 hours.

Add all of the green sauce ingredients to a blender or food processor and blend until smooth and creamy. Taste and add another squeeze of lime or pinch of salt if needed. Refrigerate until ready to serve.

Grill the chicken over medium-high heat for about 5–7 minutes per side, depending on thickness, until cooked through to 165°F. Let rest for 5 minutes, then slice and drizzle generously with the creamy green sauce.

Serve with rice, grilled corn, avocado, roasted potatoes or your favorite veggies—and definitely keep extra green sauce on the side.

Save this easy chicken dinner for later, share it with someone who needs new weeknight dinner ideas, and follow @gina_gibson_cooks for more easy, family-friendly recipes! 🌿
CHEESY BIRRIA RAMEN Rich and cheesy, perfect com CHEESY BIRRIA RAMEN

Rich and cheesy, perfect  comfort food mashup I. 

I used our favorite @momofukugoods noodles, Trader Joe’s birria, and plenty of cheese. The birria consommé gets mixed right into the creamy cheese sauce, so you get that birria flavor in every bite. Finish it with onion, cilantro and plenty of lime. 

3 packages Momofuku noodles
1 package Trader Joe’s Beef Birria, cooked and shredded (reserve ½ cup consommé)
1 tablespoon butter
2 cloves garlic, minced
4 ounces cream cheese
¾ cup milk
1 cup shredded Monterey Jack cheese
1 cup shredded Oaxaca cheese or mozzarella
1 ramen seasoning packet
¼ teaspoon cumin
Diced white onion, chopped cilantro, and lime wedges for serving

Cook the ramen noodles, then drain and set aside.

Melt the butter in the pan over medium heat. Add the garlic and cook for about 30 seconds.

Add the cream cheese, milk, ½ cup birria consommé, ramen seasoning, and cumin. Stir until smooth and creamy.

Reduce the heat to low and add the Monterey Jack mozarella cheese. Stir until melted.

Add the cooked ramen noodles and shredded birria beef and toss until everything is coated in the cheesy birria sauce. Add another splash of consommé if needed to loosen it up.

Top with diced onion, cilantro, a squeeze of lime, and extra consommé if you like.

Make sure to SAVE this one and FOLLOW along for more recipes 🙃
Summer hosting doesn’t have to be complicated. I Summer hosting doesn’t have to be complicated. 
I kept this backyard dinner simple with crispy chicken sandwiches that were a HUGE hit! I lightly coated chicken tenders in @lafishyfry Louisiana Fish Fry Brand Seasoned Chicken Fry, fried them until perfectly golden, then piled them onto toasted buns with sliced cheddar and peppery arugula tossed in @Tessemaes Spicy Dill dressing. So simple, so good.
To round out the spread, I set out @powerupsnacks Power Up Premium Trail Mix for an easy snack, @sourpunchcandy Sour Punch Bites for a sweet treat, and served everything on @SOLOcup cups and plates, which made cleanup so easy.
#Tessemaes #LAFishFry #SOLOBoldHold #SourPunchXBabbleBox #PowerUp
No-bake peanut butter pie. Creamy peanut butter No-bake peanut butter pie. 

Creamy peanut butter filling, a chocolate cookie crust, and absolutely no oven required. 

For the crust:
16 Oreo-style cookies
4 tablespoons melted butter

For the filling:
6 ounces cream cheese, softened
1 cup creamy peanut butter
⅓ cup powdered sugar
1 teaspoon vanilla extract
Pinch of salt
6 ounces Cool Whip, thawed

Optional toppings:
Melted chocolate, crushed Oreo cookies, chopped peanut butter cups, or chopped peanuts.

Pulse the cookies into fine crumbs and mix with the melted butter. Press into a small pie dish and refrigerate while you make the filling.

Beat the cream cheese until smooth. Add the peanut butter, powdered sugar, vanilla, and salt and beat until light and creamy. Gently fold in the Cool Whip until everything is combined.

Spread the filling into the crust, smooth the top, and refrigerate for at least 6 hours, or overnight for the best texture.

Before serving, drizzle with melted chocolate and sprinkle with crushed Oreo cookies if you’d like.

Save this one for your next summer get-together!
FROZEN BISCOFF ICE CREAM BARS 🤎🍦 No ice cream mak FROZEN BISCOFF ICE CREAM BARS 🤎🍦

No ice cream maker needed! These are layers of Biscoff cookies filled with the creamiest homemade no-churn Biscoff ice cream and an extra swirl of cookie butter through the center.

Easy to make and perfect for summer

Comment ICE CREAM and I’ll send you the full recipe!

Save this for an easy summer dessert and follow @gina_gibson_cooks for more simple, family-friendly recipes.
Just out here doing my little tasks and calling it Just out here doing my little tasks and calling it a day.
Peruvian-style chicken with creamy green sauce T Peruvian-style chicken with creamy green sauce 

The chicken is smoky, garlicky and grilled until juicy, but the creamy cilantro green sauce is what really makes this recipe. I could put it on just about everything.

I kept the heat family-friendly by using just one seeded jalapeño, but you can always leave some of the seeds in or add another jalapeño if you like things spicy. Serve it with rice, grilled corn, potatoes or veggies for an easy summer dinner the whole family will love.

For the chicken:

2 lbs boneless skinless chicken breasts
2 tbsp olive oil
3 cloves garlic, minced
2 tbsp fresh lime juice
1 tbsp white vinegar
2 tsp smoked paprika
1 tsp ground cumin
1 tsp dried oregano
1 tsp onion powder
1 tsp kosher salt
½ tsp black pepper

For the creamy green sauce:

1 packed cup fresh cilantro
1/3 cup mayonnaise
1/4 cup plain Greek yogurt
1 small jalapeño, seeds removed
1 garlic clove
Juice of 2 limes
2 tbsp grated parmesan
1 tbsp olive oil
1 tsp honey
½ tsp kosher salt
¼ tsp black pepper

Whisk together the olive oil, garlic, lime juice, vinegar and seasonings. Add the chicken and toss until well coated. Marinate for at least 30 minutes or up to 8 hours.

Add all of the green sauce ingredients to a blender or food processor and blend until smooth and creamy. Taste and add another squeeze of lime or pinch of salt if needed. Refrigerate until ready to serve.

Grill the chicken over medium-high heat for about 5–7 minutes per side, depending on thickness, until cooked through to 165°F. Let rest for 5 minutes, then slice and drizzle generously with the creamy green sauce.

Serve with rice, grilled corn, avocado, roasted potatoes or your favorite veggies—and definitely keep extra green sauce on the side.

Save this easy chicken dinner for later, share it with someone who needs new weeknight dinner ideas, and follow @gina_gibson_cooks for more easy, family-friendly recipes! 🌿
CHEESY BIRRIA RAMEN Rich and cheesy, perfect com CHEESY BIRRIA RAMEN

Rich and cheesy, perfect  comfort food mashup I. 

I used our favorite @momofukugoods noodles, Trader Joe’s birria, and plenty of cheese. The birria consommé gets mixed right into the creamy cheese sauce, so you get that birria flavor in every bite. Finish it with onion, cilantro and plenty of lime. 

3 packages Momofuku noodles
1 package Trader Joe’s Beef Birria, cooked and shredded (reserve ½ cup consommé)
1 tablespoon butter
2 cloves garlic, minced
4 ounces cream cheese
¾ cup milk
1 cup shredded Monterey Jack cheese
1 cup shredded Oaxaca cheese or mozzarella
1 ramen seasoning packet
¼ teaspoon cumin
Diced white onion, chopped cilantro, and lime wedges for serving

Cook the ramen noodles, then drain and set aside.

Melt the butter in the pan over medium heat. Add the garlic and cook for about 30 seconds.

Add the cream cheese, milk, ½ cup birria consommé, ramen seasoning, and cumin. Stir until smooth and creamy.

Reduce the heat to low and add the Monterey Jack mozarella cheese. Stir until melted.

Add the cooked ramen noodles and shredded birria beef and toss until everything is coated in the cheesy birria sauce. Add another splash of consommé if needed to loosen it up.

Top with diced onion, cilantro, a squeeze of lime, and extra consommé if you like.

Make sure to SAVE this one and FOLLOW along for more recipes 🙃
Summer hosting doesn’t have to be complicated. I Summer hosting doesn’t have to be complicated. 
I kept this backyard dinner simple with crispy chicken sandwiches that were a HUGE hit! I lightly coated chicken tenders in @lafishyfry Louisiana Fish Fry Brand Seasoned Chicken Fry, fried them until perfectly golden, then piled them onto toasted buns with sliced cheddar and peppery arugula tossed in @Tessemaes Spicy Dill dressing. So simple, so good.
To round out the spread, I set out @powerupsnacks Power Up Premium Trail Mix for an easy snack, @sourpunchcandy Sour Punch Bites for a sweet treat, and served everything on @SOLOcup cups and plates, which made cleanup so easy.
#Tessemaes #LAFishFry #SOLOBoldHold #SourPunchXBabbleBox #PowerUp
No-bake peanut butter pie. Creamy peanut butter No-bake peanut butter pie. 

Creamy peanut butter filling, a chocolate cookie crust, and absolutely no oven required. 

For the crust:
16 Oreo-style cookies
4 tablespoons melted butter

For the filling:
6 ounces cream cheese, softened
1 cup creamy peanut butter
⅓ cup powdered sugar
1 teaspoon vanilla extract
Pinch of salt
6 ounces Cool Whip, thawed

Optional toppings:
Melted chocolate, crushed Oreo cookies, chopped peanut butter cups, or chopped peanuts.

Pulse the cookies into fine crumbs and mix with the melted butter. Press into a small pie dish and refrigerate while you make the filling.

Beat the cream cheese until smooth. Add the peanut butter, powdered sugar, vanilla, and salt and beat until light and creamy. Gently fold in the Cool Whip until everything is combined.

Spread the filling into the crust, smooth the top, and refrigerate for at least 6 hours, or overnight for the best texture.

Before serving, drizzle with melted chocolate and sprinkle with crushed Oreo cookies if you’d like.

Save this one for your next summer get-together!

Copyright © 2026 · Daphne v2 · Designed by Designer Blogs