• About
  • Contact

Gina Gibson

simple, healthy, meals

  • Home
  • Blog
  • Recipe Index
    • Appetizers
    • Breakfast
    • Dinner
    • Salads
    • Desserts
    • Smoothies & Juices
  • Lifestyle
    • Mom Life
    • Travel
  • Shop
    • Kitchen
    • Home
    • Beauty
    • Dress Me
    • Baby & Toddler
  • Homemade Products

Crescent Roll Pizza Ring

November 13, 2024 by Gina +

The Perfect Party Appetizer or Weeknight Meal

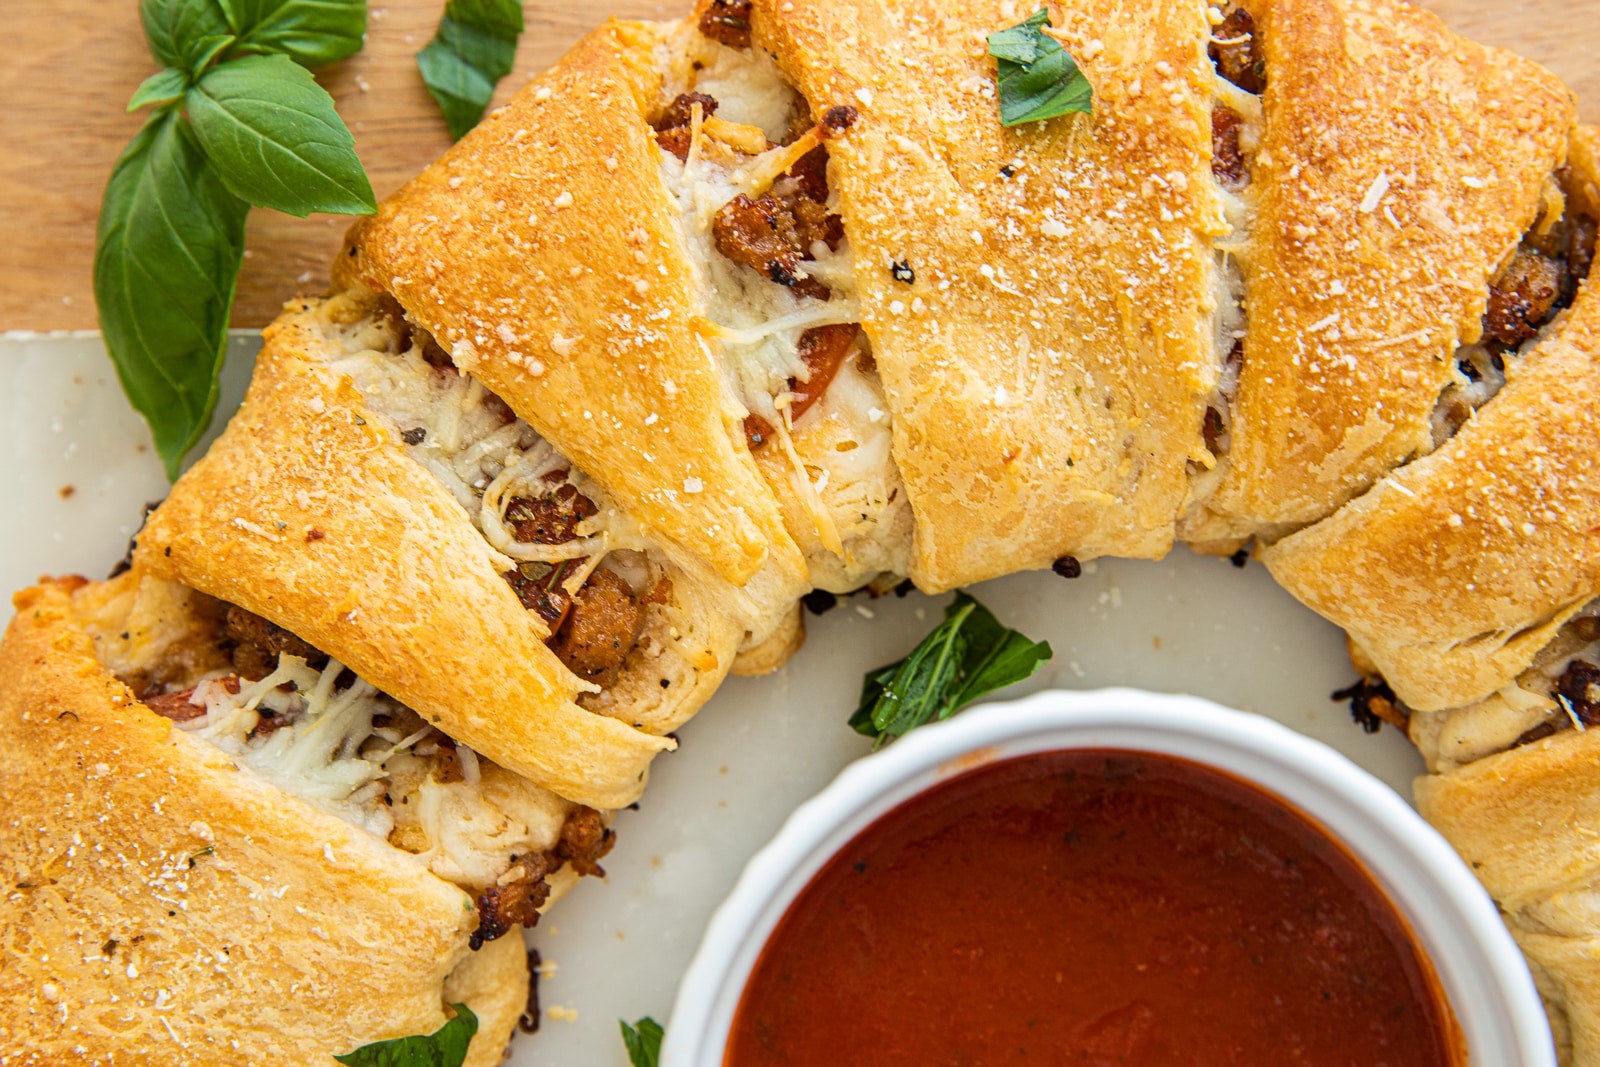
Sometimes, you just need a quick and easy recipe that everyone will love. Enter this Crescent Roll Pizza Ring! It’s a game-changer for busy weeknights, holiday gatherings, or even just a snack for the family or friends. It’s cheesy, savory, and filled with all the flavors you crave from a classic pizza, but in a fun, shareable ring shape.

What I love most about this recipe is its versatility. You can serve it as a hearty snack, a fun family dinner, or even as a festive appetizer during the holidays. The best part? It’s super customizable, so you can switch up the fillings based on your family’s favorites. Plus, it’s quick to throw together with minimal prep time, making it ideal for those busy nights when you need something tasty in a flash.

Ingredients

• 2 cans (8 oz each) refrigerated crescent roll dough

• 1 ½ cups shredded mozzarella cheese

• ½ lb mild Italian sausage, cooked and crumbled

• 20-24 slices pepperoni

• 1 teaspoon Italian seasoning

• ¼ teaspoon garlic powder

• ½ cup pizza sauce (for dipping)

• 1 tablespoon butter, melted (optional, for brushing)

• 1 tablespoon grated Parmesan cheese (optional, for garnish)

Key Ingredient Breakdown

• Crescent Roll Dough: This is the ring’s foundation, making it buttery and flaky. Using store-bought dough saves tons of time.

• Mozzarella Cheese: Melts beautifully, adding that gooey, stretchy texture everyone loves.

• Italian Sausage: Using mild sausage keeps the flavors balanced, but feel free to go for spicy if you like a kick!

• Pepperoni: Adds a classic pizza taste and extra layers of flavor. You can leave it out or substitute with your favorite pizza toppings.

• Pizza Sauce: Perfect for dipping, but if you want a saucier filling, you can add a bit inside the ring as well.

Instructions

1. Preheat the Oven: Preheat your oven to 375°F. Line a baking sheet with parchment paper.

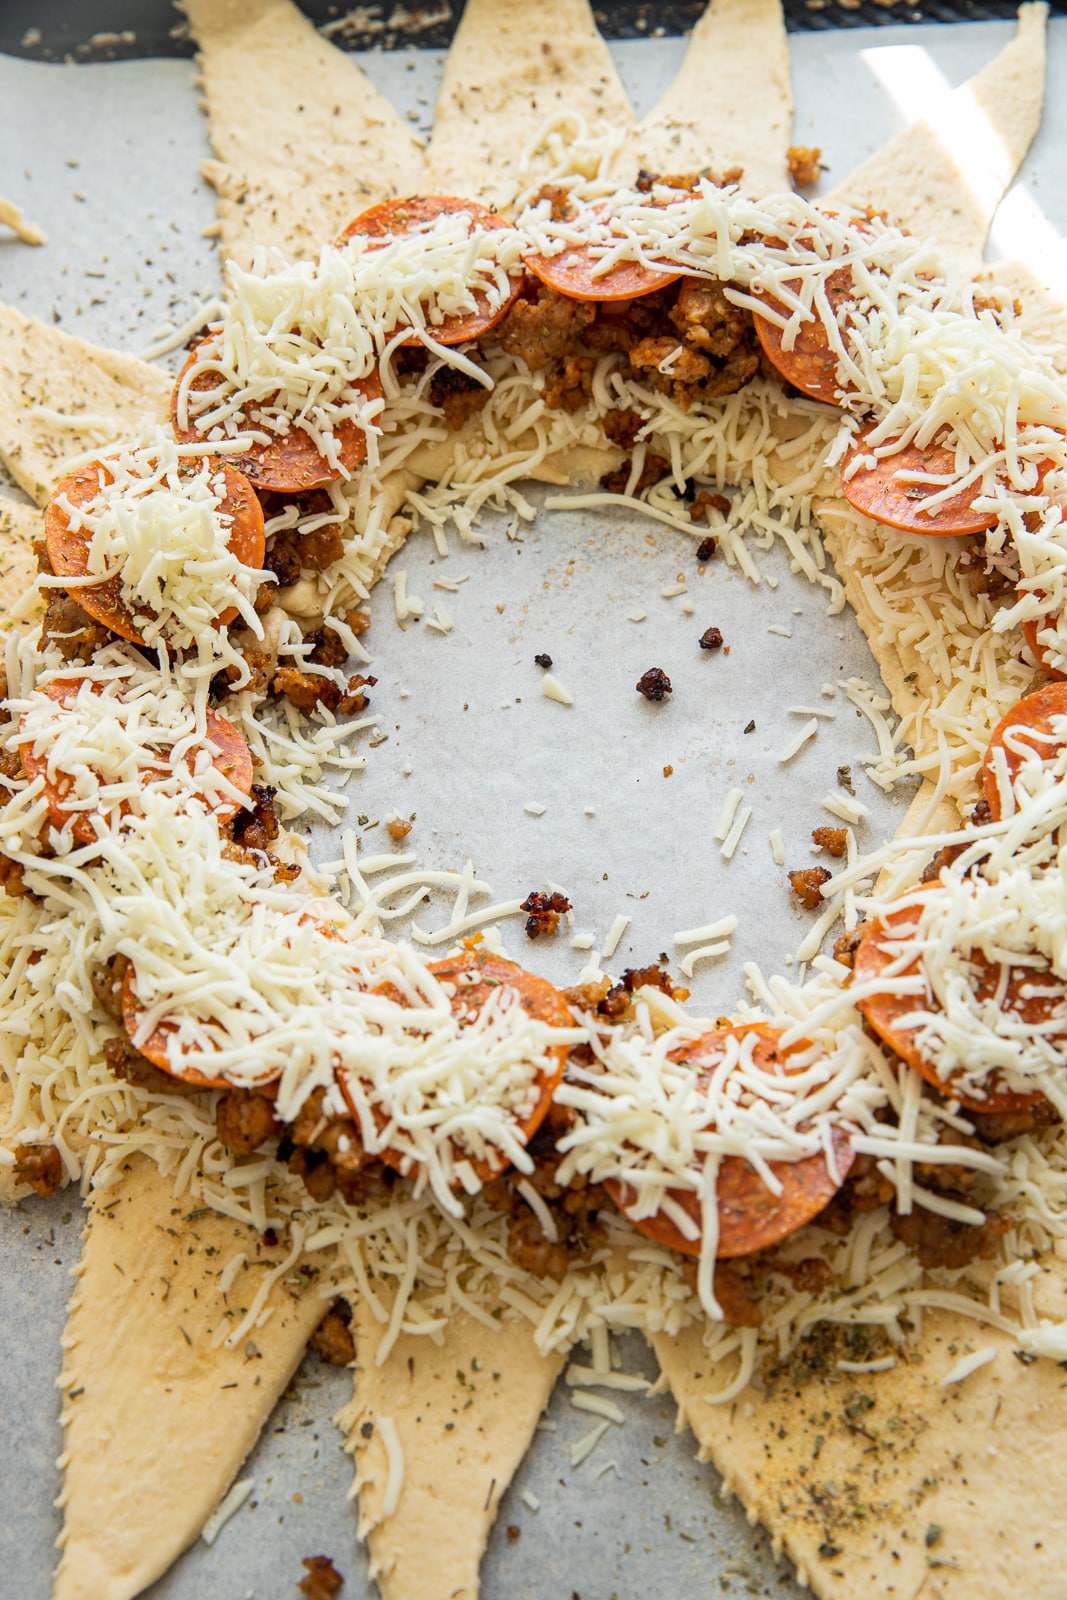
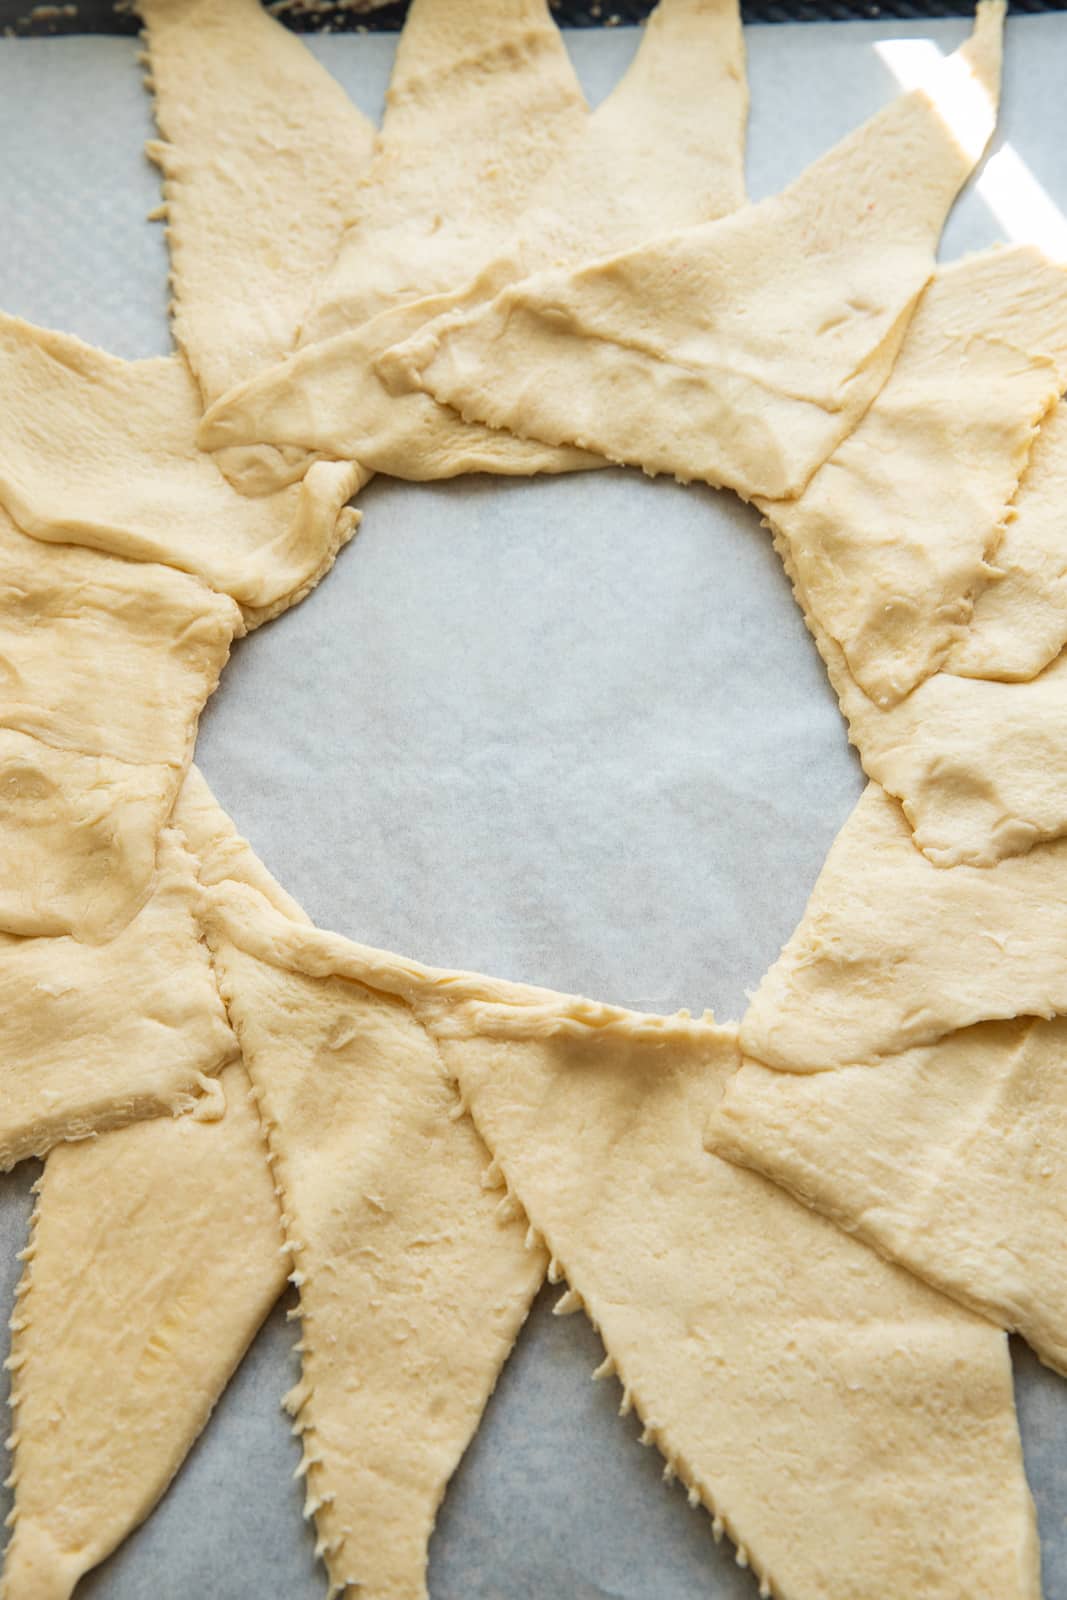
2. Arrange the Crescent Rolls: Open the crescent roll cans and separate the dough into individual triangles. On the baking sheet, arrange the triangles in a circle with the wide ends overlapping in the center, creating a sunburst pattern. The pointed ends should face outward.

3. Add the Filling:

• Sprinkle half of the shredded mozzarella cheese evenly around the base of the crescent ring, close to the center.

• Spread the cooked and crumbled Italian sausage over the cheese.

• Add a layer of pepperoni slices on top of the sausage.

• Sprinkle the remaining mozzarella cheese over the pepperoni.

• Season with Italian seasoning and garlic powder.

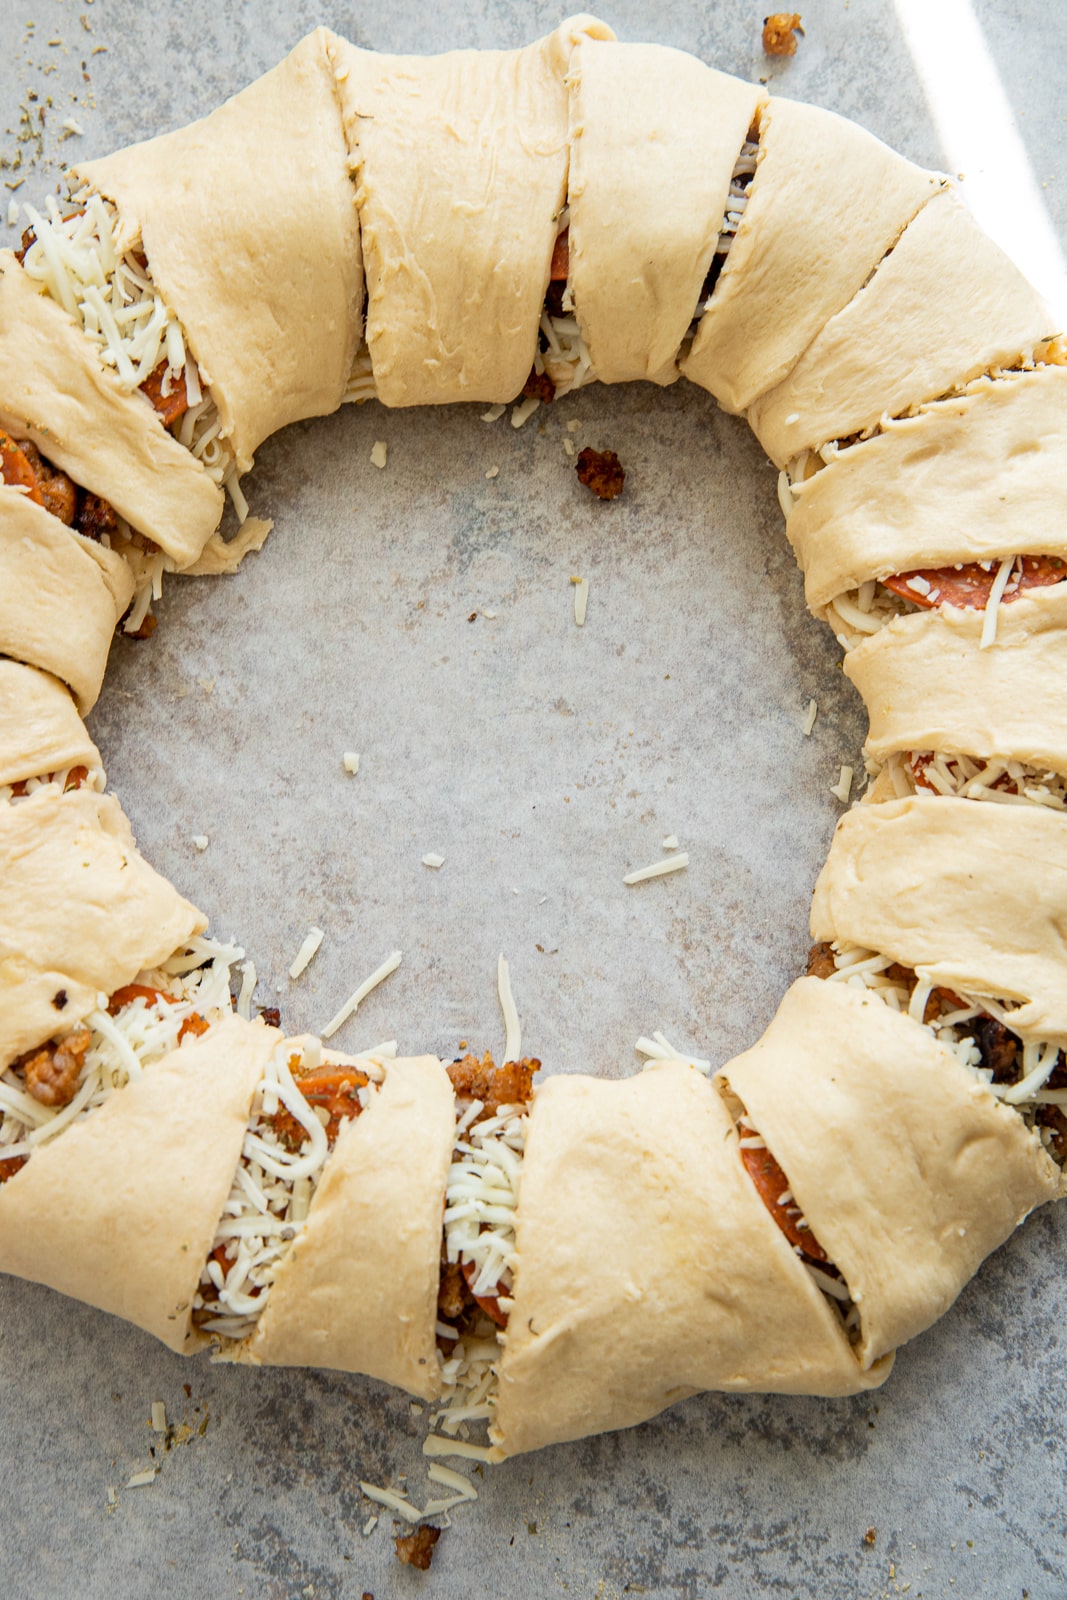
4. Fold and Seal the Ring: Carefully fold the pointed ends of each crescent triangle over the filling, tucking them under the wide ends to secure the ring. It’s okay if some filling is peeking through.

5. Bake the Pizza Ring:

• Brush the top with melted butter, if desired, and sprinkle with grated Parmesan cheese.

• Bake for 18-22 minutes, or until the crescent dough is golden brown and cooked through.

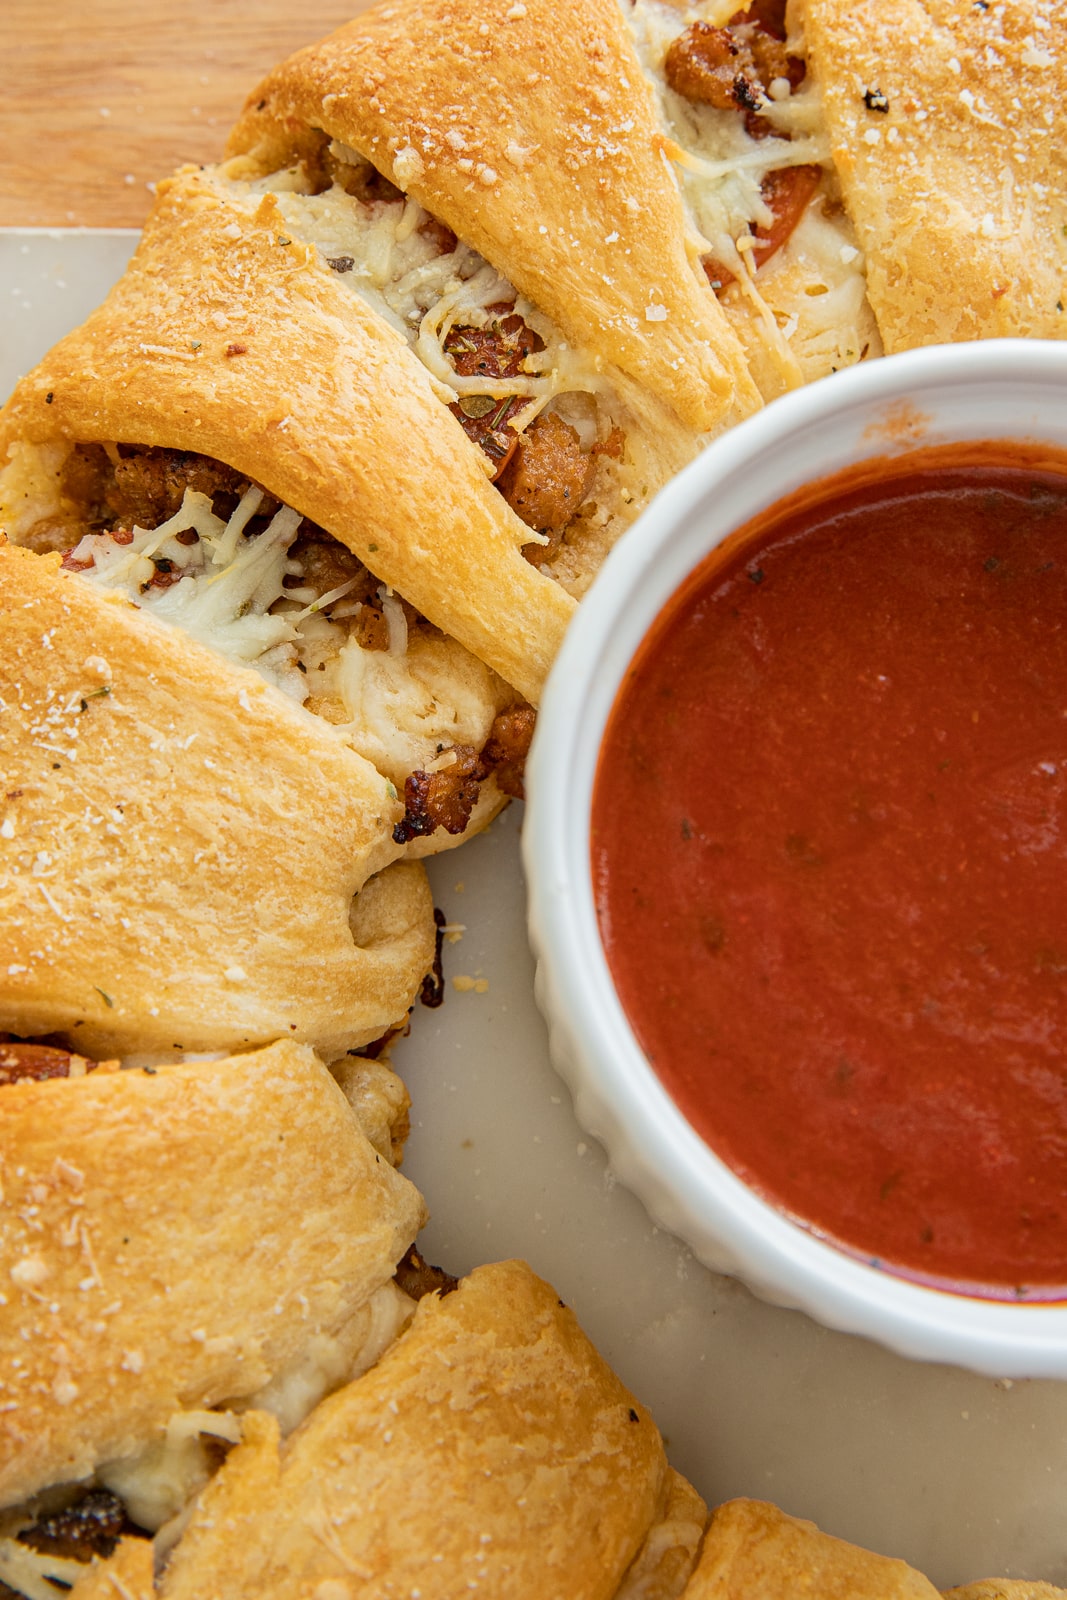
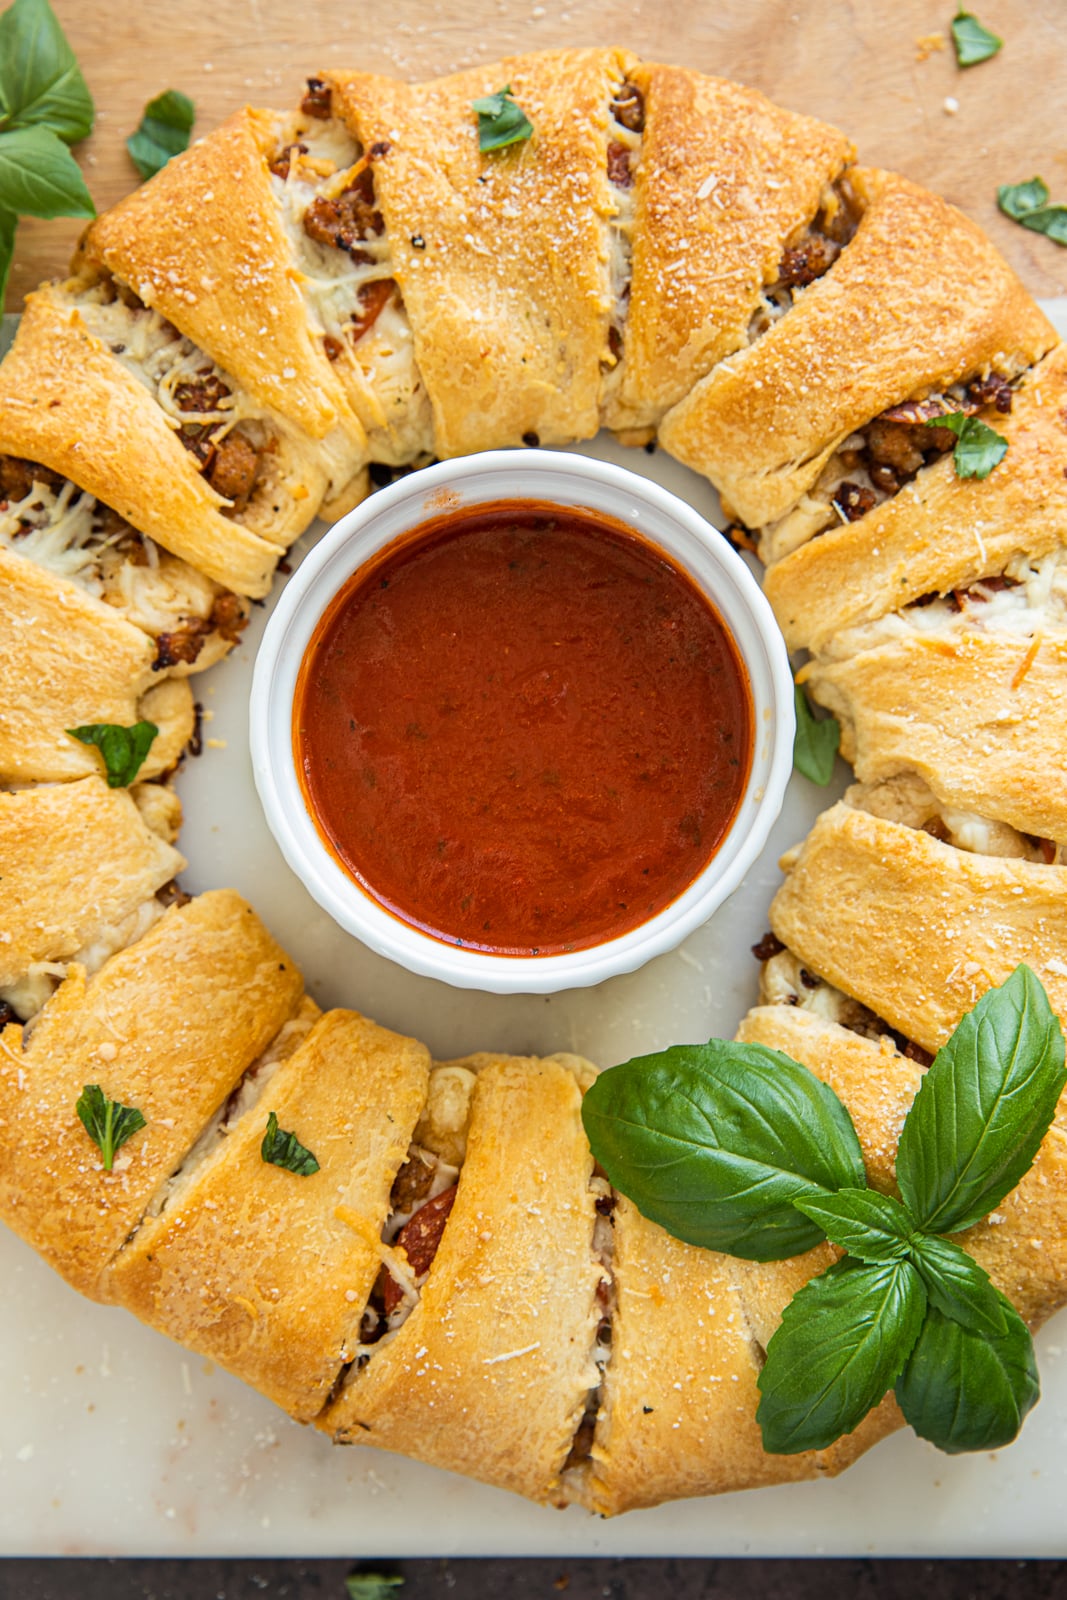
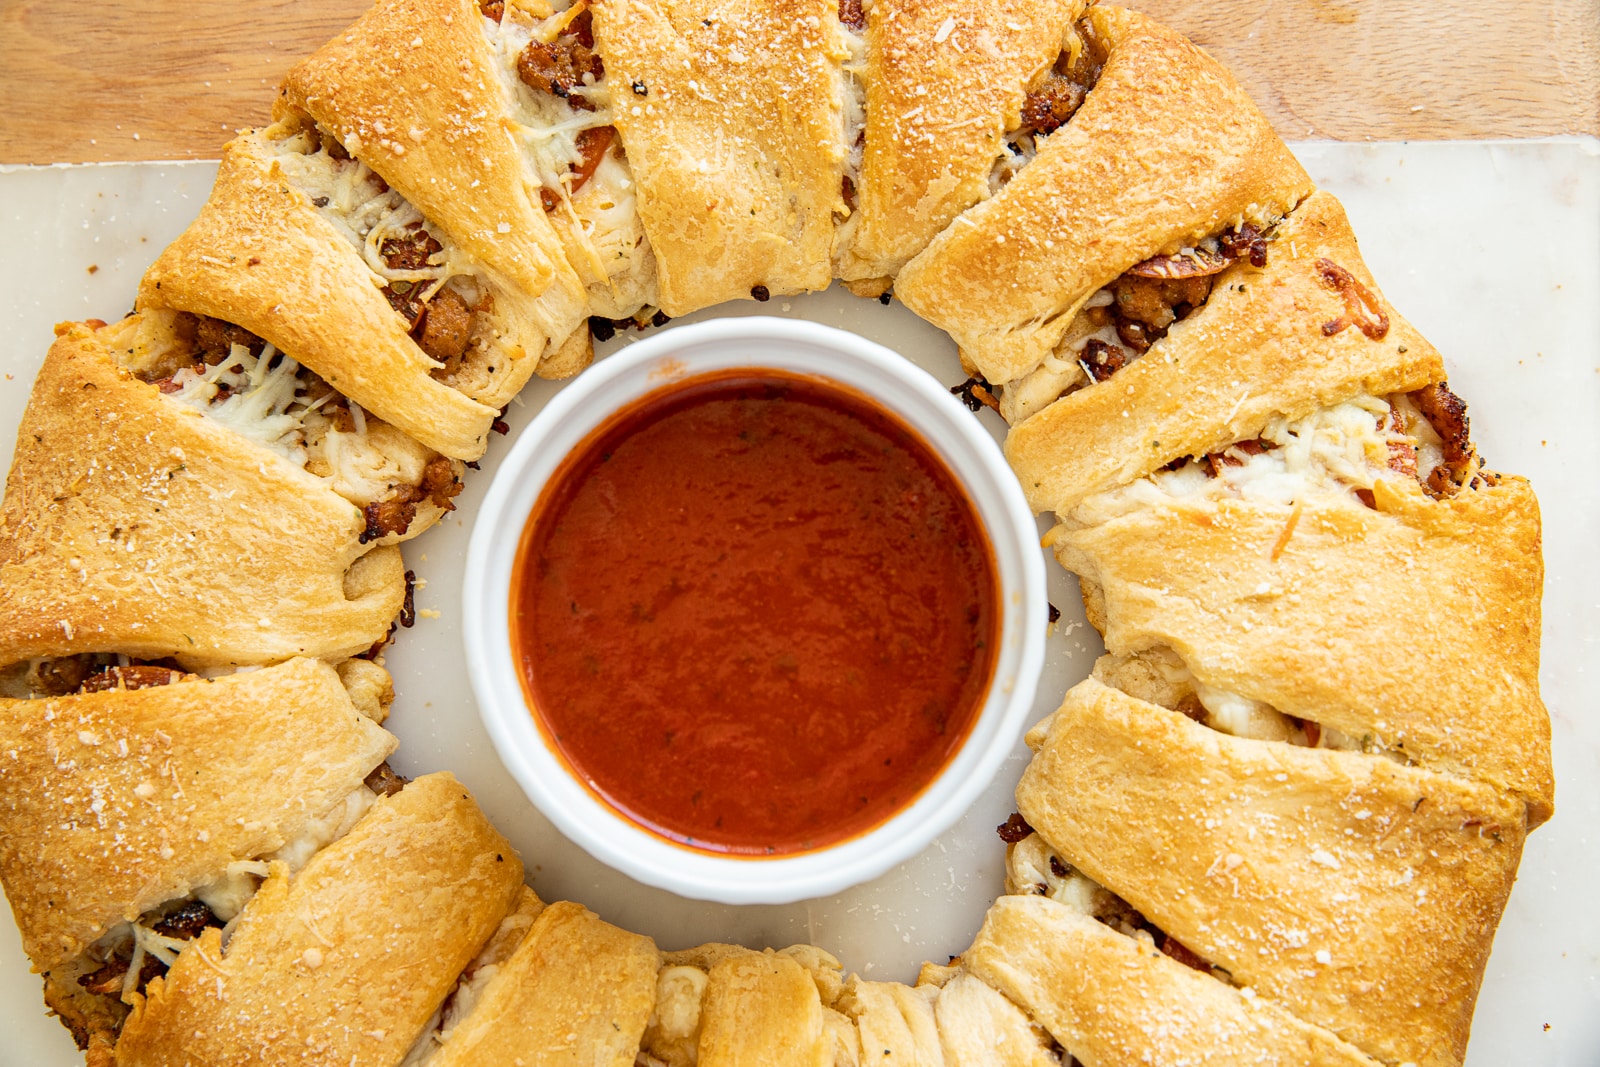
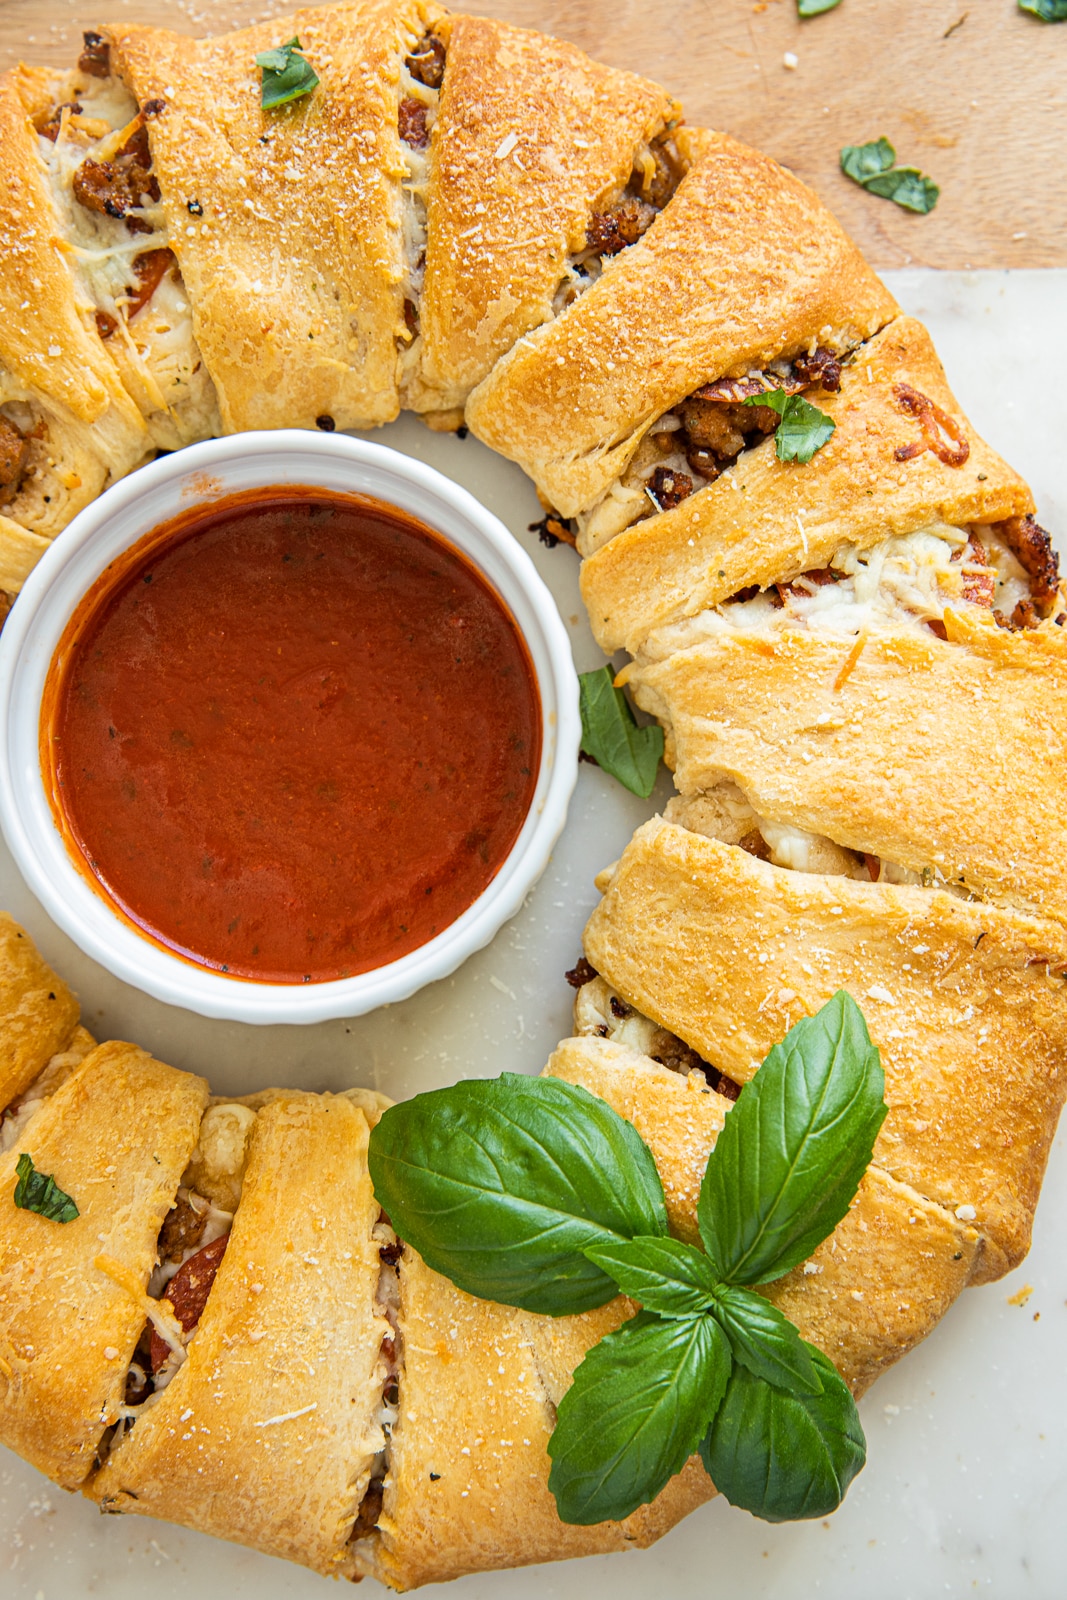
6. Cool and Serve: Allow the pizza ring to cool for 5 minutes. Transfer to a serving platter and serve warm with a bowl of pizza sauce for dipping.

Tips for Success

• Ensure Even Baking: Make sure to overlap the crescent roll dough well in the center so the ring holds together.

• Add a Kick: Sprinkle some crushed red pepper flakes on the filling if you love extra heat.

• Make It Veggie: Swap the sausage for sautéed mushrooms, bell peppers, or spinach for a vegetarian option.

FAQs

Can I use other types of cheese?

Yes! While mozzarella is classic, you can use cheddar, provolone, or a blend for extra flavor.

Can I prepare this pizza ring in advance?

Absolutely! You can assemble it, cover it tightly with plastic wrap, and refrigerate it for up to 24 hours. Just bake it when you’re ready to serve.

What other fillings can I use?

Feel free to get creative! Add sliced olives, diced bell peppers, cooked mushrooms, or even swap the sausage for ground turkey or bacon.

Can I reheat leftovers?

Yes, leftovers can be reheated in the oven at 350°F for 5-8 minutes, or in an air fryer to bring back some crispiness.

Crescent Roll Pizza Ring

5 from 1 vote
Print Recipe Pin Recipe
Prep Time 25 minutes mins
Cook Time 20 minutes mins
Servings: 16 slices
Course: Appetizer
Calories: 202
Ingredients Method Nutrition

Ingredients
  

  • 2 cans crescent roll dough
  • 1 1/2 cups shredded mozzarella
  • 1/2 lb mild sweet Italian sausage cooked and crumbled
  • 20 pepperoni slices
  • 1 tsp Italian seasoning
  • 1/4 tsp garlic powder
  • 1/2 cup pizza sauce
  • 1 tbsp butter melted
  • 1 tbsp parmesan cheese

Method
 

  1. Preheat your oven to 375°F (190°C). Line a baking sheet with parchment paper.
    Open the crescent roll cans and separate the dough into individual triangles. On the baking sheet, arrange the triangles in a circle with the wide ends overlapping in the center, creating a sunburst pattern. The pointed ends should face outward.
  2. Sprinkle half of the shredded mozzarella cheese evenly around the base of the crescent ring, close to the center.
    Spread the cooked and crumbled Italian sausage over the cheese.
    Add a layer of pepperoni slices on top of the sausage.
    Sprinkle the remaining mozzarella cheese over the pepperoni.
    Season with Italian seasoning and garlic powder.
  3. Carefully fold the pointed ends of each crescent triangle over the filling, tucking them under the wide ends to secure the ring. It’s okay if some filling is peeking through.
  4. Brush the top with melted butter, if desired, and sprinkle with grated Parmesan cheese.
    Bake for 18-22 minutes, or until the crescent dough is golden brown and cooked through.
  5. Allow the pizza ring to cool for 5 minutes. Transfer to a serving platter and serve warm with a bowl of pizza sauce for dipping.

Nutrition

Calories: 202kcalCarbohydrates: 12gProtein: 6gFat: 15gSaturated Fat: 6gPolyunsaturated Fat: 3gMonounsaturated Fat: 4gTrans Fat: 0.1gCholesterol: 24mgSodium: 478mgPotassium: 76mgFiber: 0.2gSugar: 3gVitamin A: 131IUVitamin C: 1mgCalcium: 63mgIron: 1mg
Tried this recipe?Let us know how it was!

Whether you’re hosting a holiday party, looking for an easy weeknight dinner, or simply want to impress your family with a delicious and fun dish, this Crescent Roll Pizza Ring is the way to go. It’s cheesy, savory, and totally customizable to fit your tastes. Plus, with only a few simple ingredients, you can whip it up in no time!

Don’t forget to serve it with a bowl of warm pizza sauce for dipping—because everything’s better when it’s dipped in sauce!

If you try this recipe, please leave a comment and let me know how it turned out!

You might also like:

Meatball Flatbread Baked Cream Cheese Chicken Taquitos Baked Brie Zucchini Fritters

Filed Under: Appetizers, Dinners, Recipes, Snacks Tagged With: appetizer, cheese, crescent roll, easy dinner, pizza

Comments

  1. Connie says

    November 14, 2024 at 4:07 pm

    5 stars
    This Crescent Roll Pizza Ring looks absolutely delicious! We’ve been working on some home renovations lately, and the dumpster rental just arrived today—talk about needing comfort food to get through all the chaos! I can’t wait to try this recipe; it seems like the perfect easy dinner after a long day of organizing. Thanks for sharing!

    • Gina says

      December 2, 2024 at 4:07 pm

      Hope you enjoy!

If your kids love mozzarella sticks, you need to t If your kids love mozzarella sticks, you need to try these cheese stuffed chicken bites.

Crispy on the outside, gooey on the inside, and wrapped in seasoned chicken so they’re packed with protein. My boys love these in their school lunches. I warm them in the morning, wrap them in foil, and tuck them into their lunchboxes.

Comment RECIPE and I’ll send it straight to your DMs.
Chicken Caesar Smashburger Tacos Mini street taco Chicken Caesar Smashburger Tacos

Mini street taco tortillas (or Mission low-carb), thin smashed ground chicken, and a simple Caesar salad on top. Crispy on the outside, juicy in the middle, and fresh from the salad.

We top ours with chopped Caesar salad, crispy bacon, and sometimes avocado. So good.

Mini street taco flour tortillas or @missionfoodsus low-carb tortillas
1 lb ground chicken
Salt, pepper, garlic powder
2 oz ground chicken per taco
Caesar salad
Cooked bacon, chopped (optional)
Avocado, diced (optional)

How to 
Season the ground chicken with salt, pepper, and garlic powder.
Spread about 2 oz of ground chicken thinly onto each tortilla.
Heat a lightly oiled skillet over medium heat.
Place the tortilla meat-side down in the skillet and cook for about 3 minutes, pressing lightly so it stays flat.
Flip and cook another 2–3 minutes, until the chicken is fully cooked through.
Top with chopped Caesar salad, bacon, and avocado.
These Crispy Cornflake Chicken Tenders? My kids ar These Crispy Cornflake Chicken Tenders?
My kids are asking for them on repeat. 

Golden, crunchy, pantry-staples — no flour, no deep frying. 

Just chicken, crushed cornflakes, a little BBQ sauce, some seasoning… into the air fryer (or oven) and dinner is handled.

They’re easy and they’re kid-approved!

📌 Save this for your next dinner plan. 

Comment CHICKEN and I’ll send you the recipe.
Sometimes you just need a really good grilled chee Sometimes you just need a really good grilled cheese.

Creamy brie, sharp white cheddar, thin slices of Honeycrisp apple, salty prosciutto, and a drizzle of hot honey layered between buttery sourdough and grilled until perfectly golden.
It’s melty, sweet, salty, crispy — and somehow still feels light enough for almost-spring
These ham and cheese biscuits are a delicious week These ham and cheese biscuits are a delicious weekday breakfast win!
Minimal prep, bake, and done and the whole family loves them

I finished with parmesan and served with jam on the side which is so good. Maybe even a sprinkle of powdered sugar 🙃

Ingredients
1 can refrigerated biscuit dough
1 cup deli ham chopped
1 cup fontina cheese shredded
4 eggs 
1/4 cup milk
1/4 tsp garlic powder, 1/2 tsp salt
1 tablespoon butter melted
2 tablespoons grated parmesan cheese

Instructions
preheat oven to 375 degrees
lightly grease a muffin tin
separate the biscuit dough cut each one into 8-10 cubes
in a large bowl, whisk the eggs.
add chopped ham and shredded fontina to the bowl. 
Gently folded in the cut biscuits
bake for 18 to 22 minutes until golden and cooked through adding about 5 extra minutes if needed
brush tops with melted butter and sprinkle with parmesan

Total time about 25 minutes

Serve warm with jam on the side
Sweet, creamy, buttery goodness in every bite 😍 Th Sweet, creamy, buttery goodness in every bite 😍
These Strawberry Cheesecake Crumble Bars start with a buttery graham cracker crust, get layered with a creamy cheesecake filling, and finish with juicy strawberries and a  crumble on top

Want the full recipe? Comment “recipe” below and I’ll send it straight to your DMs!

Copyright © 2026 · Daphne v2 · Designed by Designer Blogs