• About
  • Contact

Gina Gibson

simple, healthy, meals

  • Home
  • Blog
  • Recipe Index
    • Appetizers
    • Breakfast
    • Dinner
    • Salads
    • Desserts
    • Smoothies & Juices
  • Lifestyle
    • Mom Life
    • Travel
  • Shop
    • Kitchen
    • Home
    • Beauty
    • Dress Me
    • Baby & Toddler
  • Homemade Products

Homemade Chicken Tenders (That Stay Juicy!)

July 13, 2025 by Gina +

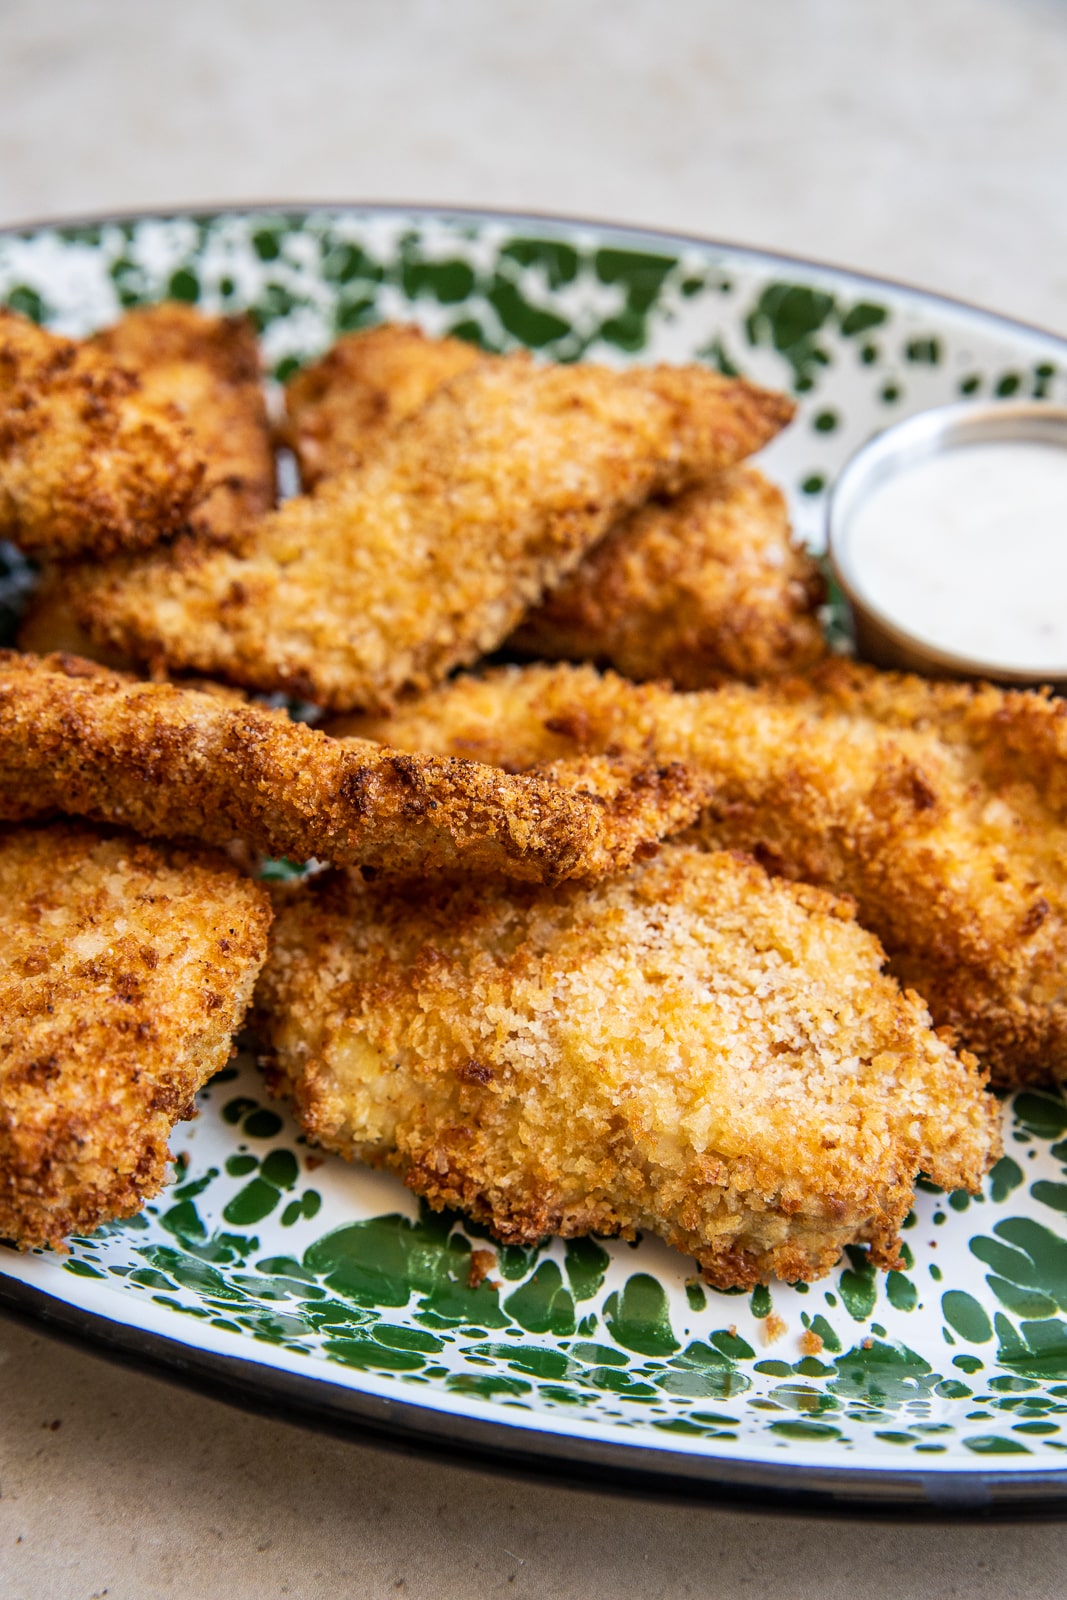
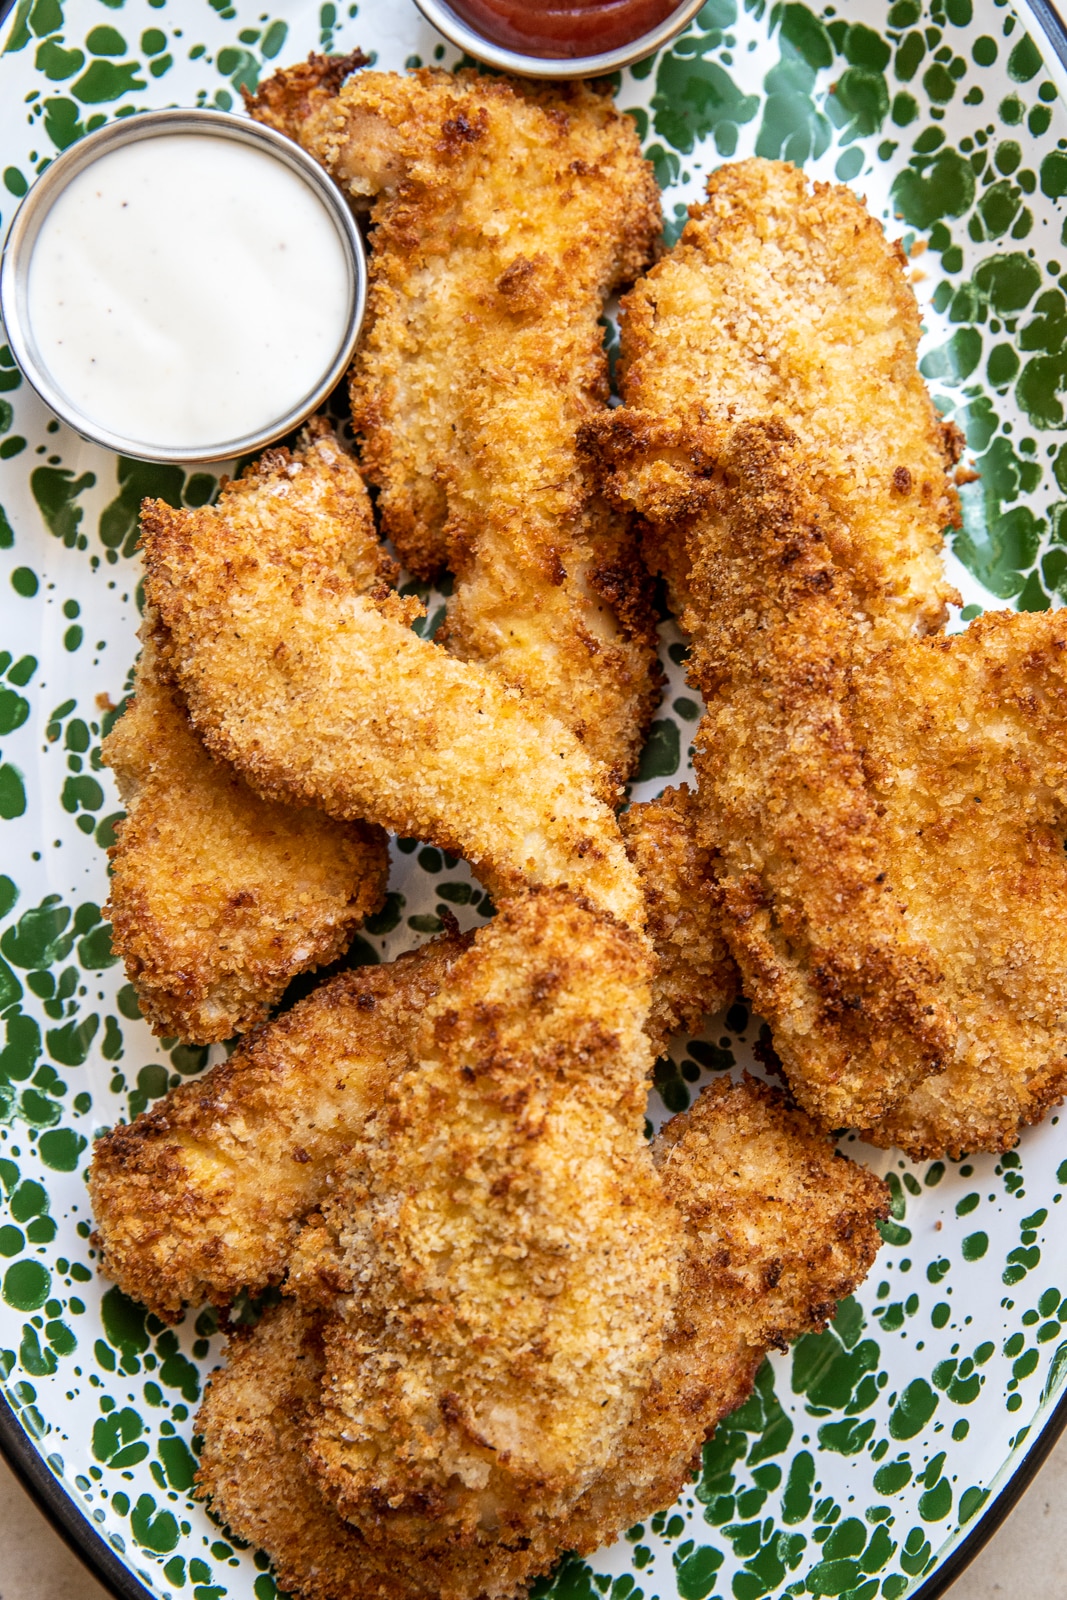
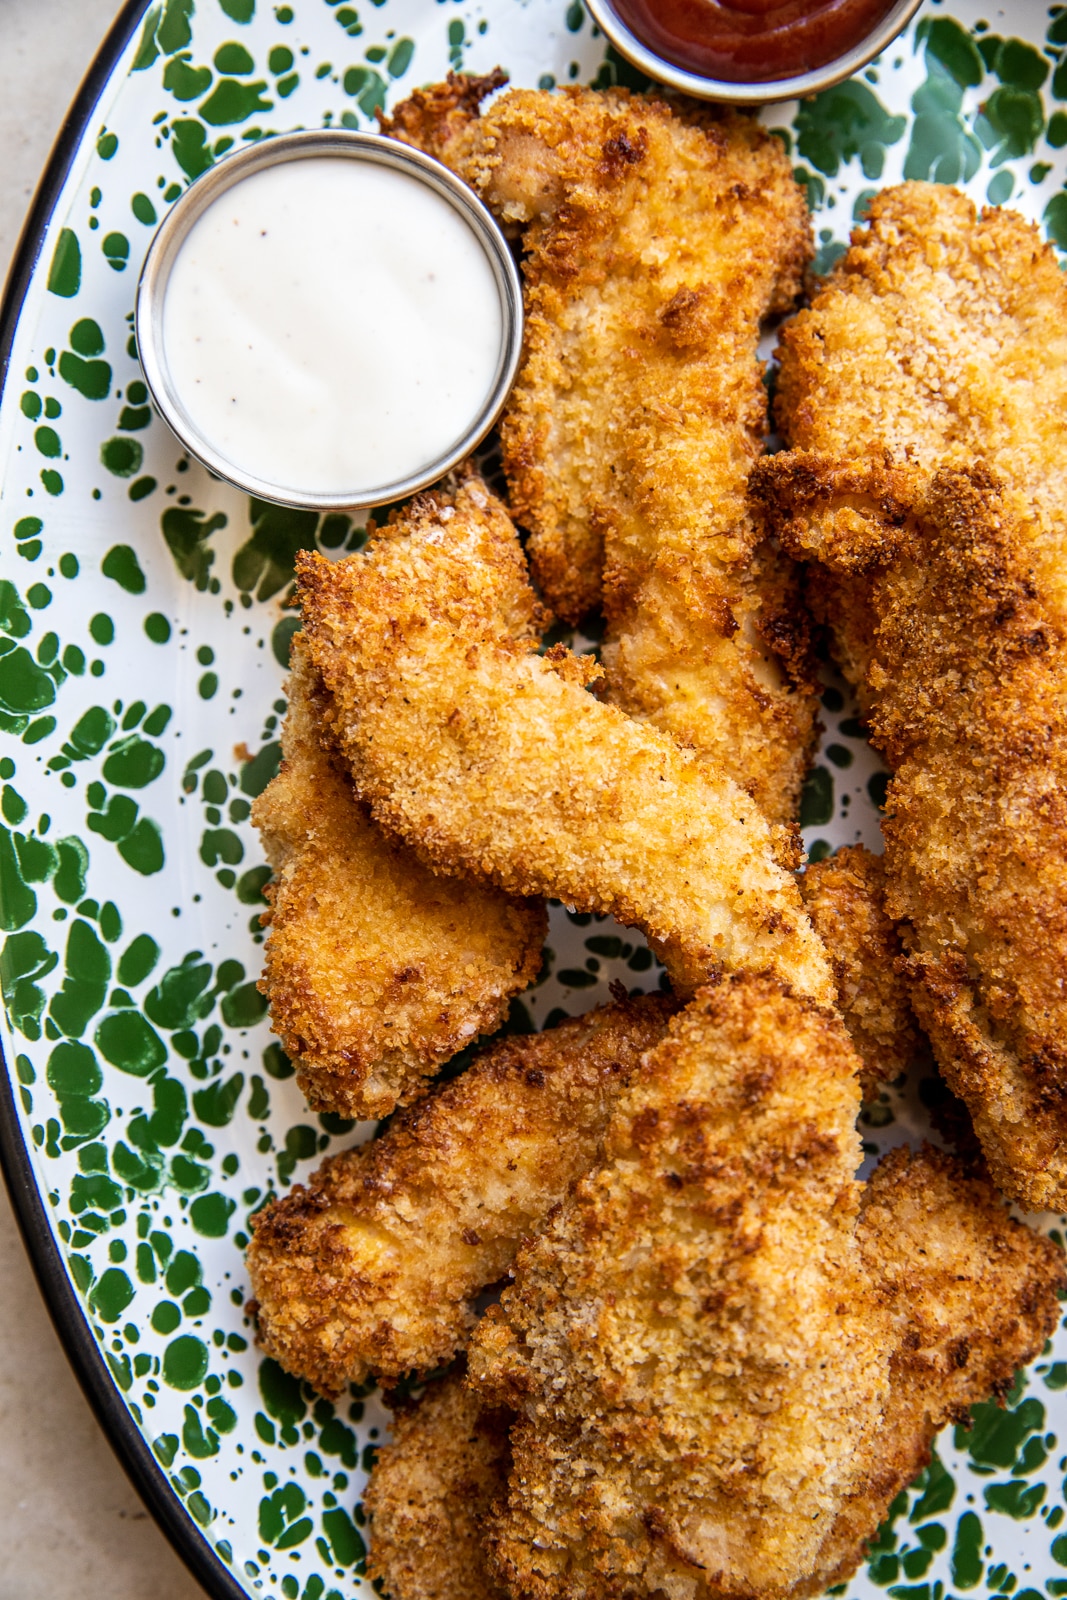
These crispy chicken tenders are the answer to soggy store-bought strips. They’re golden, crunchy, kid-approved — and thanks to a quick brine, they’re unbelievably juicy every time.

Unlike many air fryer or oven-baked recipes that dry out fast, this version locks in moisture and reheats like a dream. Whether you’re feeding picky eaters or prepping high-protein snacks for the week, these tenders are a win.


Why You’ll Love This Recipe

  • Extra crispy outside, tender and juicy inside
  • Simple pantry ingredients
  • Kid-friendly
  • Air fryer or oven compatible
  • Meal prep, freezer, and reheat friendly

Ingredient Breakdown

Here’s what you’ll need to make the perfect chicken tenders at home:

For the Brine:

  • 2 tablespoons salt
  • 4 cups water
  • Optional: 1 tablespoon sugar or honey (balances flavor)

For the Chicken:

  • 2 large chicken breasts, sliced into strips
  • 1 cup all-purpose flour
  • 2 large eggs, whisked
  • 1½ cups panko breadcrumbs
  • 1 teaspoon garlic powder
  • 1 teaspoon smoked paprika
  • 1 teaspoon salt
  • ½ teaspoon black pepper
  • Spray oil (avocado or olive)

How to Brine Chicken Tenders (Optional, but HIGHLY recommended)

Brining chicken before breading adds noticeable moisture and flavor. Here’s how:

  1. In a large bowl, dissolve 2 tbsp salt in 4 cups cold water.
  2. Submerge chicken strips in the brine.
  3. Cover and refrigerate for 30 minutes to 1 hour.
  4. Drain and pat the chicken dry before seasoning and breading.

Skip if you’re short on time, but it’s worth it for better texture.


Instructions

  1. Preheat air fryer to 400°F (or oven to 425°F).
  2. Season chicken with garlic powder, paprika, salt, and pepper.
  3. Dredge chicken: first in flour, then eggs, then panko.
  4. Spray tenders lightly with oil for maximum crisp.
  5. Air Fry for 10–12 minutes, flipping at halfway.
    • Or Bake on parchment or wire rack for 15–18 minutes.
  6. Let rest 5 minutes before serving or packing.

Pro Tips for Perfect Tenders

  • Use panko for max crunch — it’s lighter and crispier than regular breadcrumbs.
  • Brining = moisture magic. Don’t skip it if you want juicy tenders.
  • Spray oil before cooking is key for golden color and even browning.
  • Flip once during air frying or baking to prevent soggy bottoms.
  • Let cool on a rack, not a plate — it keeps the bottom crispy.
Freezing Instructions

  1. Allow cooked tenders to cool completely.
  2. Arrange in a single layer on a baking sheet.
  3. Freeze for 30–60 minutes, then transfer to a zip-top freezer bag.
  4. Label and date. Freeze for up to 2 months.

Reheating Instructions

  • Air Fryer: 375°F for 5–7 minutes (no need to thaw)
  • Oven: 400°F for 10–12 minutes
  • Toaster Oven: 375°F for 6–8 minutes
    ❌ Avoid microwaving — it kills the crisp!

FAQ

Can I make these gluten-free?
Yes — sub in gluten-free flour and gluten-free panko or crushed cornflakes.

What dipping sauces go best?
Honey mustard, BBQ, ranch, or a spicy Greek yogurt sriracha sauce.

Can I cook from frozen?
Yes! Just add 2–3 minutes to the air fryer or oven cook time.

How long do they last in the fridge?
Up to 4 days in an airtight container.

How do I know they’re fully cooked?
Use a meat thermometer — internal temp should be 165°F.

You might also like:

Pumpkin Cheesecake Donut Holes Cheesy Pumpkin Lasagna Rollups Default ThumbnailCopycat Starbucks Pumpkin Cream Cheese Muffin Recipe Default ThumbnailChocolate Chip Pizookie (Cookie Skillet)

Filed Under: Uncategorized

FROZEN BISCOFF ICE CREAM BARS 🤎🍦 No ice cream mak FROZEN BISCOFF ICE CREAM BARS 🤎🍦

No ice cream maker needed! These are layers of Biscoff cookies filled with the creamiest homemade no-churn Biscoff ice cream and an extra swirl of cookie butter through the center.

Easy to make and perfect for summer

Comment ICE CREAM and I’ll send you the full recipe!

Save this for an easy summer dessert and follow @gina_gibson_cooks for more simple, family-friendly recipes.
Just out here doing my little tasks and calling it Just out here doing my little tasks and calling it a day.
Peruvian-style chicken with creamy green sauce T Peruvian-style chicken with creamy green sauce 

The chicken is smoky, garlicky and grilled until juicy, but the creamy cilantro green sauce is what really makes this recipe. I could put it on just about everything.

I kept the heat family-friendly by using just one seeded jalapeño, but you can always leave some of the seeds in or add another jalapeño if you like things spicy. Serve it with rice, grilled corn, potatoes or veggies for an easy summer dinner the whole family will love.

For the chicken:

2 lbs boneless skinless chicken breasts
2 tbsp olive oil
3 cloves garlic, minced
2 tbsp fresh lime juice
1 tbsp white vinegar
2 tsp smoked paprika
1 tsp ground cumin
1 tsp dried oregano
1 tsp onion powder
1 tsp kosher salt
½ tsp black pepper

For the creamy green sauce:

1 packed cup fresh cilantro
1/3 cup mayonnaise
1/4 cup plain Greek yogurt
1 small jalapeño, seeds removed
1 garlic clove
Juice of 2 limes
2 tbsp grated parmesan
1 tbsp olive oil
1 tsp honey
½ tsp kosher salt
¼ tsp black pepper

Whisk together the olive oil, garlic, lime juice, vinegar and seasonings. Add the chicken and toss until well coated. Marinate for at least 30 minutes or up to 8 hours.

Add all of the green sauce ingredients to a blender or food processor and blend until smooth and creamy. Taste and add another squeeze of lime or pinch of salt if needed. Refrigerate until ready to serve.

Grill the chicken over medium-high heat for about 5–7 minutes per side, depending on thickness, until cooked through to 165°F. Let rest for 5 minutes, then slice and drizzle generously with the creamy green sauce.

Serve with rice, grilled corn, avocado, roasted potatoes or your favorite veggies—and definitely keep extra green sauce on the side.

Save this easy chicken dinner for later, share it with someone who needs new weeknight dinner ideas, and follow @gina_gibson_cooks for more easy, family-friendly recipes! 🌿
CHEESY BIRRIA RAMEN Rich and cheesy, perfect com CHEESY BIRRIA RAMEN

Rich and cheesy, perfect  comfort food mashup I. 

I used our favorite @momofukugoods noodles, Trader Joe’s birria, and plenty of cheese. The birria consommé gets mixed right into the creamy cheese sauce, so you get that birria flavor in every bite. Finish it with onion, cilantro and plenty of lime. 

3 packages Momofuku noodles
1 package Trader Joe’s Beef Birria, cooked and shredded (reserve ½ cup consommé)
1 tablespoon butter
2 cloves garlic, minced
4 ounces cream cheese
¾ cup milk
1 cup shredded Monterey Jack cheese
1 cup shredded Oaxaca cheese or mozzarella
1 ramen seasoning packet
¼ teaspoon cumin
Diced white onion, chopped cilantro, and lime wedges for serving

Cook the ramen noodles, then drain and set aside.

Melt the butter in the pan over medium heat. Add the garlic and cook for about 30 seconds.

Add the cream cheese, milk, ½ cup birria consommé, ramen seasoning, and cumin. Stir until smooth and creamy.

Reduce the heat to low and add the Monterey Jack mozarella cheese. Stir until melted.

Add the cooked ramen noodles and shredded birria beef and toss until everything is coated in the cheesy birria sauce. Add another splash of consommé if needed to loosen it up.

Top with diced onion, cilantro, a squeeze of lime, and extra consommé if you like.

Make sure to SAVE this one and FOLLOW along for more recipes 🙃
Summer hosting doesn’t have to be complicated. I Summer hosting doesn’t have to be complicated. 
I kept this backyard dinner simple with crispy chicken sandwiches that were a HUGE hit! I lightly coated chicken tenders in @lafishyfry Louisiana Fish Fry Brand Seasoned Chicken Fry, fried them until perfectly golden, then piled them onto toasted buns with sliced cheddar and peppery arugula tossed in @Tessemaes Spicy Dill dressing. So simple, so good.
To round out the spread, I set out @powerupsnacks Power Up Premium Trail Mix for an easy snack, @sourpunchcandy Sour Punch Bites for a sweet treat, and served everything on @SOLOcup cups and plates, which made cleanup so easy.
#Tessemaes #LAFishFry #SOLOBoldHold #SourPunchXBabbleBox #PowerUp
No-bake peanut butter pie. Creamy peanut butter No-bake peanut butter pie. 

Creamy peanut butter filling, a chocolate cookie crust, and absolutely no oven required. 

For the crust:
16 Oreo-style cookies
4 tablespoons melted butter

For the filling:
6 ounces cream cheese, softened
1 cup creamy peanut butter
⅓ cup powdered sugar
1 teaspoon vanilla extract
Pinch of salt
6 ounces Cool Whip, thawed

Optional toppings:
Melted chocolate, crushed Oreo cookies, chopped peanut butter cups, or chopped peanuts.

Pulse the cookies into fine crumbs and mix with the melted butter. Press into a small pie dish and refrigerate while you make the filling.

Beat the cream cheese until smooth. Add the peanut butter, powdered sugar, vanilla, and salt and beat until light and creamy. Gently fold in the Cool Whip until everything is combined.

Spread the filling into the crust, smooth the top, and refrigerate for at least 6 hours, or overnight for the best texture.

Before serving, drizzle with melted chocolate and sprinkle with crushed Oreo cookies if you’d like.

Save this one for your next summer get-together!
FROZEN BISCOFF ICE CREAM BARS 🤎🍦 No ice cream mak FROZEN BISCOFF ICE CREAM BARS 🤎🍦

No ice cream maker needed! These are layers of Biscoff cookies filled with the creamiest homemade no-churn Biscoff ice cream and an extra swirl of cookie butter through the center.

Easy to make and perfect for summer

Comment ICE CREAM and I’ll send you the full recipe!

Save this for an easy summer dessert and follow @gina_gibson_cooks for more simple, family-friendly recipes.
Just out here doing my little tasks and calling it Just out here doing my little tasks and calling it a day.
Peruvian-style chicken with creamy green sauce T Peruvian-style chicken with creamy green sauce 

The chicken is smoky, garlicky and grilled until juicy, but the creamy cilantro green sauce is what really makes this recipe. I could put it on just about everything.

I kept the heat family-friendly by using just one seeded jalapeño, but you can always leave some of the seeds in or add another jalapeño if you like things spicy. Serve it with rice, grilled corn, potatoes or veggies for an easy summer dinner the whole family will love.

For the chicken:

2 lbs boneless skinless chicken breasts
2 tbsp olive oil
3 cloves garlic, minced
2 tbsp fresh lime juice
1 tbsp white vinegar
2 tsp smoked paprika
1 tsp ground cumin
1 tsp dried oregano
1 tsp onion powder
1 tsp kosher salt
½ tsp black pepper

For the creamy green sauce:

1 packed cup fresh cilantro
1/3 cup mayonnaise
1/4 cup plain Greek yogurt
1 small jalapeño, seeds removed
1 garlic clove
Juice of 2 limes
2 tbsp grated parmesan
1 tbsp olive oil
1 tsp honey
½ tsp kosher salt
¼ tsp black pepper

Whisk together the olive oil, garlic, lime juice, vinegar and seasonings. Add the chicken and toss until well coated. Marinate for at least 30 minutes or up to 8 hours.

Add all of the green sauce ingredients to a blender or food processor and blend until smooth and creamy. Taste and add another squeeze of lime or pinch of salt if needed. Refrigerate until ready to serve.

Grill the chicken over medium-high heat for about 5–7 minutes per side, depending on thickness, until cooked through to 165°F. Let rest for 5 minutes, then slice and drizzle generously with the creamy green sauce.

Serve with rice, grilled corn, avocado, roasted potatoes or your favorite veggies—and definitely keep extra green sauce on the side.

Save this easy chicken dinner for later, share it with someone who needs new weeknight dinner ideas, and follow @gina_gibson_cooks for more easy, family-friendly recipes! 🌿
CHEESY BIRRIA RAMEN Rich and cheesy, perfect com CHEESY BIRRIA RAMEN

Rich and cheesy, perfect  comfort food mashup I. 

I used our favorite @momofukugoods noodles, Trader Joe’s birria, and plenty of cheese. The birria consommé gets mixed right into the creamy cheese sauce, so you get that birria flavor in every bite. Finish it with onion, cilantro and plenty of lime. 

3 packages Momofuku noodles
1 package Trader Joe’s Beef Birria, cooked and shredded (reserve ½ cup consommé)
1 tablespoon butter
2 cloves garlic, minced
4 ounces cream cheese
¾ cup milk
1 cup shredded Monterey Jack cheese
1 cup shredded Oaxaca cheese or mozzarella
1 ramen seasoning packet
¼ teaspoon cumin
Diced white onion, chopped cilantro, and lime wedges for serving

Cook the ramen noodles, then drain and set aside.

Melt the butter in the pan over medium heat. Add the garlic and cook for about 30 seconds.

Add the cream cheese, milk, ½ cup birria consommé, ramen seasoning, and cumin. Stir until smooth and creamy.

Reduce the heat to low and add the Monterey Jack mozarella cheese. Stir until melted.

Add the cooked ramen noodles and shredded birria beef and toss until everything is coated in the cheesy birria sauce. Add another splash of consommé if needed to loosen it up.

Top with diced onion, cilantro, a squeeze of lime, and extra consommé if you like.

Make sure to SAVE this one and FOLLOW along for more recipes 🙃
Summer hosting doesn’t have to be complicated. I Summer hosting doesn’t have to be complicated. 
I kept this backyard dinner simple with crispy chicken sandwiches that were a HUGE hit! I lightly coated chicken tenders in @lafishyfry Louisiana Fish Fry Brand Seasoned Chicken Fry, fried them until perfectly golden, then piled them onto toasted buns with sliced cheddar and peppery arugula tossed in @Tessemaes Spicy Dill dressing. So simple, so good.
To round out the spread, I set out @powerupsnacks Power Up Premium Trail Mix for an easy snack, @sourpunchcandy Sour Punch Bites for a sweet treat, and served everything on @SOLOcup cups and plates, which made cleanup so easy.
#Tessemaes #LAFishFry #SOLOBoldHold #SourPunchXBabbleBox #PowerUp
No-bake peanut butter pie. Creamy peanut butter No-bake peanut butter pie. 

Creamy peanut butter filling, a chocolate cookie crust, and absolutely no oven required. 

For the crust:
16 Oreo-style cookies
4 tablespoons melted butter

For the filling:
6 ounces cream cheese, softened
1 cup creamy peanut butter
⅓ cup powdered sugar
1 teaspoon vanilla extract
Pinch of salt
6 ounces Cool Whip, thawed

Optional toppings:
Melted chocolate, crushed Oreo cookies, chopped peanut butter cups, or chopped peanuts.

Pulse the cookies into fine crumbs and mix with the melted butter. Press into a small pie dish and refrigerate while you make the filling.

Beat the cream cheese until smooth. Add the peanut butter, powdered sugar, vanilla, and salt and beat until light and creamy. Gently fold in the Cool Whip until everything is combined.

Spread the filling into the crust, smooth the top, and refrigerate for at least 6 hours, or overnight for the best texture.

Before serving, drizzle with melted chocolate and sprinkle with crushed Oreo cookies if you’d like.

Save this one for your next summer get-together!
FROZEN BISCOFF ICE CREAM BARS 🤎🍦 No ice cream mak FROZEN BISCOFF ICE CREAM BARS 🤎🍦

No ice cream maker needed! These are layers of Biscoff cookies filled with the creamiest homemade no-churn Biscoff ice cream and an extra swirl of cookie butter through the center.

Easy to make and perfect for summer

Comment ICE CREAM and I’ll send you the full recipe!

Save this for an easy summer dessert and follow @gina_gibson_cooks for more simple, family-friendly recipes.
Just out here doing my little tasks and calling it Just out here doing my little tasks and calling it a day.
Peruvian-style chicken with creamy green sauce T Peruvian-style chicken with creamy green sauce 

The chicken is smoky, garlicky and grilled until juicy, but the creamy cilantro green sauce is what really makes this recipe. I could put it on just about everything.

I kept the heat family-friendly by using just one seeded jalapeño, but you can always leave some of the seeds in or add another jalapeño if you like things spicy. Serve it with rice, grilled corn, potatoes or veggies for an easy summer dinner the whole family will love.

For the chicken:

2 lbs boneless skinless chicken breasts
2 tbsp olive oil
3 cloves garlic, minced
2 tbsp fresh lime juice
1 tbsp white vinegar
2 tsp smoked paprika
1 tsp ground cumin
1 tsp dried oregano
1 tsp onion powder
1 tsp kosher salt
½ tsp black pepper

For the creamy green sauce:

1 packed cup fresh cilantro
1/3 cup mayonnaise
1/4 cup plain Greek yogurt
1 small jalapeño, seeds removed
1 garlic clove
Juice of 2 limes
2 tbsp grated parmesan
1 tbsp olive oil
1 tsp honey
½ tsp kosher salt
¼ tsp black pepper

Whisk together the olive oil, garlic, lime juice, vinegar and seasonings. Add the chicken and toss until well coated. Marinate for at least 30 minutes or up to 8 hours.

Add all of the green sauce ingredients to a blender or food processor and blend until smooth and creamy. Taste and add another squeeze of lime or pinch of salt if needed. Refrigerate until ready to serve.

Grill the chicken over medium-high heat for about 5–7 minutes per side, depending on thickness, until cooked through to 165°F. Let rest for 5 minutes, then slice and drizzle generously with the creamy green sauce.

Serve with rice, grilled corn, avocado, roasted potatoes or your favorite veggies—and definitely keep extra green sauce on the side.

Save this easy chicken dinner for later, share it with someone who needs new weeknight dinner ideas, and follow @gina_gibson_cooks for more easy, family-friendly recipes! 🌿
CHEESY BIRRIA RAMEN Rich and cheesy, perfect com CHEESY BIRRIA RAMEN

Rich and cheesy, perfect  comfort food mashup I. 

I used our favorite @momofukugoods noodles, Trader Joe’s birria, and plenty of cheese. The birria consommé gets mixed right into the creamy cheese sauce, so you get that birria flavor in every bite. Finish it with onion, cilantro and plenty of lime. 

3 packages Momofuku noodles
1 package Trader Joe’s Beef Birria, cooked and shredded (reserve ½ cup consommé)
1 tablespoon butter
2 cloves garlic, minced
4 ounces cream cheese
¾ cup milk
1 cup shredded Monterey Jack cheese
1 cup shredded Oaxaca cheese or mozzarella
1 ramen seasoning packet
¼ teaspoon cumin
Diced white onion, chopped cilantro, and lime wedges for serving

Cook the ramen noodles, then drain and set aside.

Melt the butter in the pan over medium heat. Add the garlic and cook for about 30 seconds.

Add the cream cheese, milk, ½ cup birria consommé, ramen seasoning, and cumin. Stir until smooth and creamy.

Reduce the heat to low and add the Monterey Jack mozarella cheese. Stir until melted.

Add the cooked ramen noodles and shredded birria beef and toss until everything is coated in the cheesy birria sauce. Add another splash of consommé if needed to loosen it up.

Top with diced onion, cilantro, a squeeze of lime, and extra consommé if you like.

Make sure to SAVE this one and FOLLOW along for more recipes 🙃
Summer hosting doesn’t have to be complicated. I Summer hosting doesn’t have to be complicated. 
I kept this backyard dinner simple with crispy chicken sandwiches that were a HUGE hit! I lightly coated chicken tenders in @lafishyfry Louisiana Fish Fry Brand Seasoned Chicken Fry, fried them until perfectly golden, then piled them onto toasted buns with sliced cheddar and peppery arugula tossed in @Tessemaes Spicy Dill dressing. So simple, so good.
To round out the spread, I set out @powerupsnacks Power Up Premium Trail Mix for an easy snack, @sourpunchcandy Sour Punch Bites for a sweet treat, and served everything on @SOLOcup cups and plates, which made cleanup so easy.
#Tessemaes #LAFishFry #SOLOBoldHold #SourPunchXBabbleBox #PowerUp
No-bake peanut butter pie. Creamy peanut butter No-bake peanut butter pie. 

Creamy peanut butter filling, a chocolate cookie crust, and absolutely no oven required. 

For the crust:
16 Oreo-style cookies
4 tablespoons melted butter

For the filling:
6 ounces cream cheese, softened
1 cup creamy peanut butter
⅓ cup powdered sugar
1 teaspoon vanilla extract
Pinch of salt
6 ounces Cool Whip, thawed

Optional toppings:
Melted chocolate, crushed Oreo cookies, chopped peanut butter cups, or chopped peanuts.

Pulse the cookies into fine crumbs and mix with the melted butter. Press into a small pie dish and refrigerate while you make the filling.

Beat the cream cheese until smooth. Add the peanut butter, powdered sugar, vanilla, and salt and beat until light and creamy. Gently fold in the Cool Whip until everything is combined.

Spread the filling into the crust, smooth the top, and refrigerate for at least 6 hours, or overnight for the best texture.

Before serving, drizzle with melted chocolate and sprinkle with crushed Oreo cookies if you’d like.

Save this one for your next summer get-together!

Copyright © 2026 · Daphne v2 · Designed by Designer Blogs